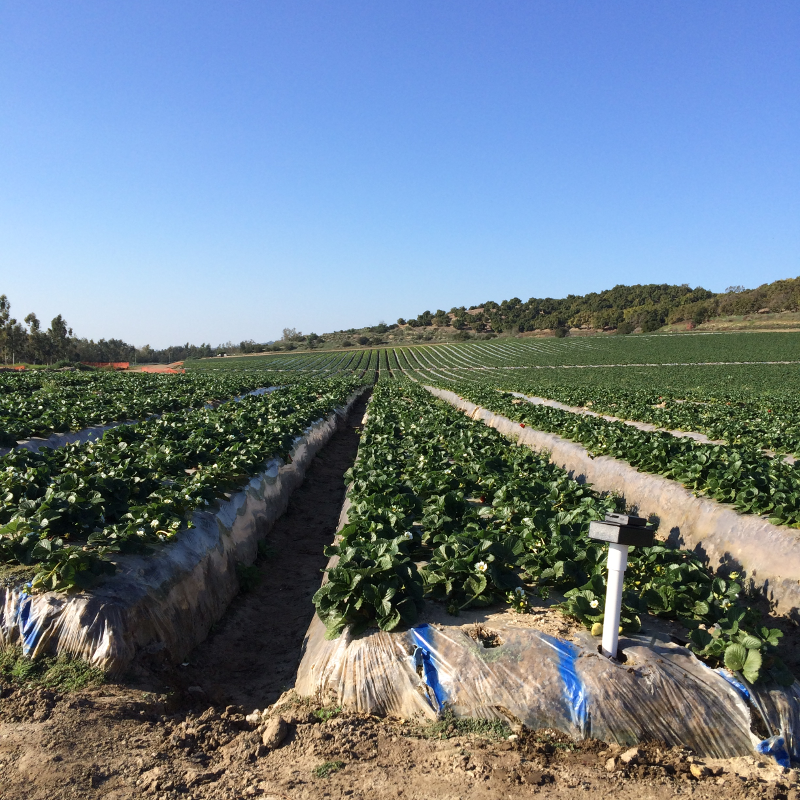
In the first article of this series, we covered how the AyrMesh HubDuo can be used to provide a relatively dense, continuous “cloud” of WiFi over a relatively small area (hundreds to low thousands of acres). In the second article in this series, we covered how to use the AyrMesh Hub2 series (the AyrMesh Hub2x2 and Hub2T) to create a “sparse” mesh across a huge area – many thousands of acres.
Dense Mesh
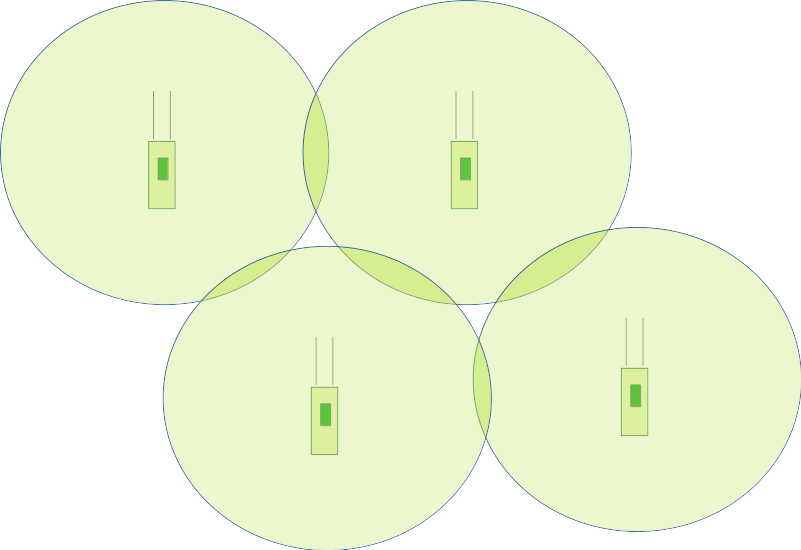
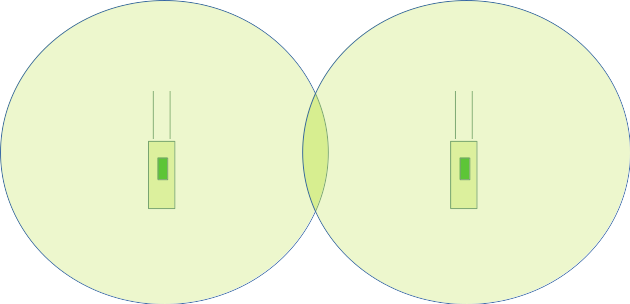
However, you don’t have to choose one or the other. The AyrMesh HubDuo has a “Hybrid mode” that allows it to create a “close in” mesh between nearby HubDuo units for a relatively “dense” mesh and a mesh with distant Hub2 Units for a “sparse” mesh across your fields.
The way it does this is that it uses the 5.8 GHz. radio for the “close,” dense mesh and the 2.4 GHz. radio for the farther “sparse” mesh. The Gateway Hub has to be an AyrMesh HubDuo, because the Gateway turns the meshing for both radios on. The Remote HubDuos only have the 5.8 GHz. mesh radio on (they still have WiFi on both bands) and the Hub2 units further away, of course, only use 2.4 GHz.
Sparse Mesh
This gives you the option of starting with one option and later including the other – you’re not “trapped” with either. Even if you start with a “sparse” mesh using a Hub2 as your Gateway Hub, you can replace it with a HubDuo, expand the “close” network using additional HubDuos, and use the Hub2 as a Remote elsewhere on the farm. Any Hub can serve either role.
Hybrid Mesh – Dense Mesh near the Gateway, Sparse Mesh Further Away
The AyrMesh WiFi Mesh is flexible and modular, designed to provide you with a way to cover the ground you need with strong, reliable WiFi. Once you have the network for one purpose, whether it’s to provide WiFi in your farmyard or across your fields, you may discover just how handy it is in other places. The modularity of AyrMesh allows you to quickly and easily extend your network as needed.
Please let us know in the comments what you think about this – are we on the right track, or are there other things you’d like to see? What benefits have you seen from extending your network? What has kept you from expanding your AyrMesh network further?
On the last blog post, we showed how meshing can expand continuous WiFi coverage across a large area – up to hundreds of acres – using the AyrMesh HubDuo.
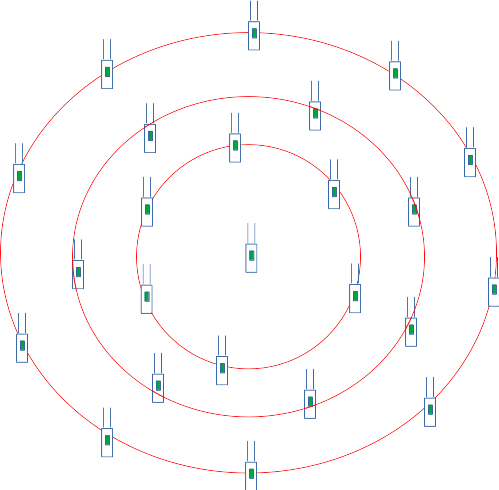
We recommend using no more than three “hops” over Hubs across your network to maintain good bandwidth (speed). To maintain consistent continuous coverage for a smartphone, the Hubs should be positioned about half a mile apart. The usual way to think about the network is as a set of concentric “rings” around the Gateway Hub, so, in this case, the last ring of Hubs are only a mile and a half from the center. With the coverage extending an additional quarter of a mile from the outer Hubs, that would provide a circle of WiFi out 1.75 miles from the Gateway Hub (3.5 miles across).
Three “rings” of AyrMesh Hubs
Calculating the area, we find that “maximal ring” of Hubs covers 9.6 square miles, or over 6,000 acres – an impressive area! However, of course, your Internet source is not always in the center of the property, and you may not want to go to the trouble and expense to place enough AyrMesh Hubs to provide WiFi so you can walk through your fields with continuous coverage.
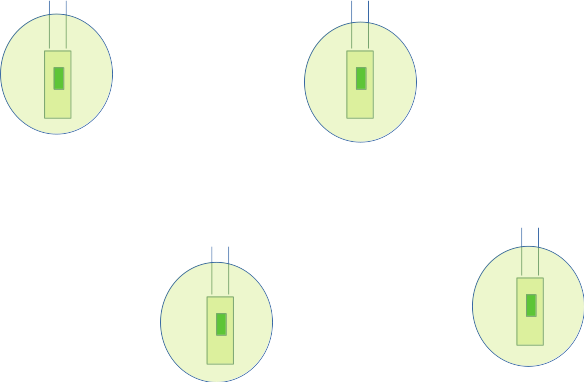
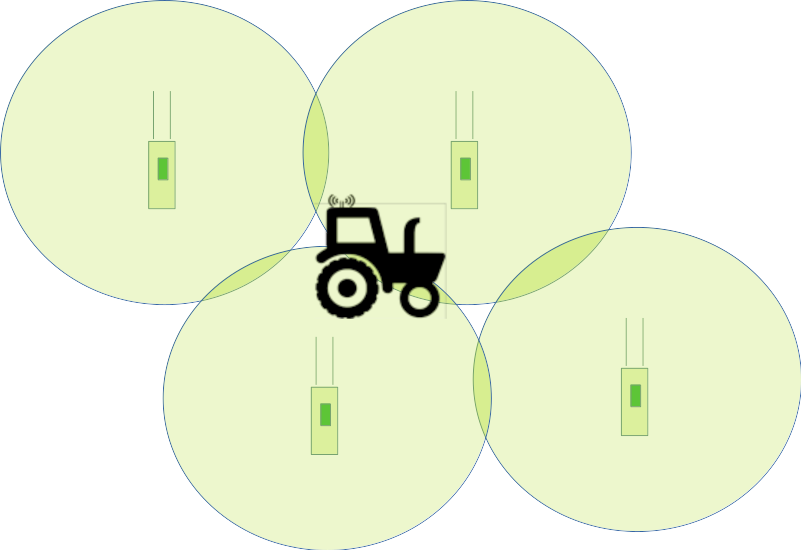
We realized two things: first, the Hubs (especially the “Hub2” series – The AyrMesh Hub2x2 and AyrMesh Hub2T) can be placed 2.5 miles apart, so the density of the network could be much, much less. Second, of course, we understood that most farmers drive across their land using tractors, sprayers, combines, trucks, or UTVs. So, if we put an AyrMesh Hub on the vehicle they were driving, it would be able to connect to the stationary Hubs and provide WiFi in and around the vehicle, where people are actually working. The result is a mesh that’s very sparse and only exists in limited areas (from the perspective of a “normal WiFi device”):
Spot Coverage with AyrMesh Hubs
becomes a much more dense mesh with the addition of the AyrMesh Cab Hub:
As long as you are within a few hundred yards of the vehicle you brought out in the field, you’ll have good WiFi coverage, even though the nearest stationary Hub may be over a mile away.
Using the same math we used before, we can place the Hubs 2.5 miles apart, so three “rings” of Hubs places the last Hub 7.5 miles away from the Gateway Hub. Assuming the Cab Hub can go a mile beyond the last Hub and still have very good connectivity, that gives a circle with a radius of 8.5 miles or a diameter of 17 miles. A circle 17 miles across is an area of over 226 square miles, or over 145,250 acres. Even in Texas, that’s a pretty big spread.
It should be noted that we recommend three “hops” because, each time the signal “hops” across a Hub, the available bandwidth is halved. As a result, the bandwidth after the third Hub is only 1/8 the bandwidth of the Gateway Hub. However, a fourth and even a fifth hop may be possible to provide signal to low-bandwidth devices like sensors and actuators.
Your mileage will vary (you see what I did there…) – very few farms have huge continuous acreage like this, and covering non-contiguous acreage is trickier – that’s one of the reasons we introduced the AyrMesh Bridge.
However, the result is that you can cover a LOT of acreage using AyrMesh Hubs. So we have covered how to have a relatively “dense” mesh over a smaller area and a “sparse” mesh over a much larger area. Amazingly, using the AyrMesh Hubs, you can have BOTH kinds of network at once – a dense network over one area and a sparse network out over your fields. We’ll cover that in the last installment of this series.
We get a lot of questions about the range of the AyrMesh Hubs. We do have a fairly good explanation of the range of the Hubs on Ayrstone.com, but there have been enough questions and, especially, comments on Facebook, that I decided to write a good blog post about it.
The AyrMesh Hubs offer the longest “omni-directional” WiFi range available, because they use the highest possible legal power with the highest-gain antennas.
WiFi is intrinsically a “2-way” communications medium. The Hub has to be able to transmit a signal out to whatever device you’re trying to connect AND receive a signal back from that device. The high power and high-gain antennas help cast the signal out a long ways, but the high-gain antennas also “pull in” the signal from your device, which is almost always weaker than the Hub’s signal, and that what limits the Hub’s range.
Because the Hubs have powerful radios and large antennas, they can communicate with each other up to 2.5 miles (4 km) apart. However, since a small, battery-operated device with a tiny internal antenna (think an iPhone or a Ring camera) has a tiny fraction of that output power and antenna gain, the range to that device will be MUCH less – usually a few hundred yards. The Hub is already extending the device’s range far beyond what the manufacturer ever imagined – those devices are designed for a range of 100 feet or so for use in a typical home or office.
So the range of a single Hub is excellent – a few hundred yards to a phone or up to half a mile to a laptop, but, wait, we claim we can get you wireless across your farm, right? Are we just terrible liars? Schemers? Scammers? (see numerous social media posts…)
Here is the “magic” of meshing – using additional Hubs, you can extend the range of a single Hub out far away, in every direction, for miles. Remote Hubs are like “repeaters” – they receive the mesh signal from one Hub and create a new, “fresh” (same power) WiFi signal for devices to connect to, and a new mesh signal for other Hubs to connect to. Because of this, you can “daisy-chain” Hubs out across your farm for a long ways.
There are two ways to create the mesh on your farm, which we call “spot” and “continuous,” but they’re not necessarily mutually exclusive. To start with, we’ll just talk about the “continuous” method.
AyrMesh HubDuo
When you’re thinking about WiFi coverage, you’re usually thinking about continuous coverage so you can wander freely, using your phone without interruptions. Since your phone has fairly limited range, your Hubs have to be fairly close together. The AyrMesh HubDuo is perfectly suited for this kind of installation, because HubDuos can be spaced relatively closely together – as close as a few hundred feet apart using a HubDuo-specific feature called “close mode.“
There is a real danger in placing the Hubs too close together: as mentioned, the Hubs have very powerful signals – much more powerful than the devices connecting to them – so, if the Hubs are too close together, those powerful signals can “overwhelm” the nearby Hubs so they can’t “hear” normal WiFi devices. For a phone or laptop between two Hubs that are too close together, trying to “talk” to one of the Hubs is like trying to have a normal conversation at a rock concert: the Hubs are “talking” so loudly your device can’t make itself heard.
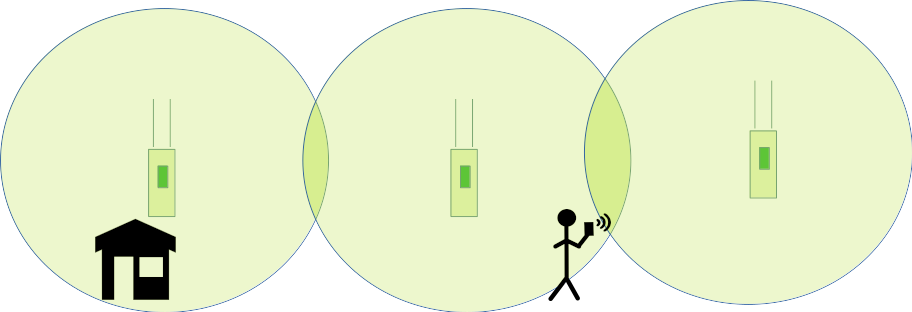
So, how do you determine where to site Remote Hubs? For continuous coverage, it’s actually pretty simple: with the device you’re going to be using the most (or most critically), just walk away from the Hub in the direction you want to extend the network until you start to lose the signal on that device. Then site a Hub about twice that distance away:
The circles indicate the maximum range from the Hub to your target device – it’s good to leave a little overlap so you’ll have continuous coverage as you go from one Hub to the other. You can continue this process with additional Hubs:
…and so on to cover the area you want. Note that, with the AyrMesh HubDuo, these can be as close as 200 yards or so (sometimes closer if there are trees, etc.), so you can have intensive coverage over a “smaller” area (under a hundred acres). They can also be placed a mile or so apart (with good “line of sight” between them) for “continuous coverage” for higher-power devices like laptops or cameras with external antennas. We recommend going no more than three “hops” from the Gateway Hub, but, with the Hubs placed a mile apart, you can have good signal for a laptop out up to three and a half miles.
This is fine for hundreds of acres, such as a farm yard, smaller farm, nursery, or other rural business. For a large production farm, we generally recommend using the “spot” method – we’ll cover that in the next post.
As you may recall, we did a survey a few weeks back, and we promised to let you know the results of that survey. So, here they are.
There were a total of 45 responses; geographically, they look like this:
That seems about right – most Ayrstone users are in the Midwest, with the East, West, and South coming up behind. I had expected the South to be better-represented, but I think we were too close to planting season there. Thank you to the users who provided specific locations – we didn’t ask, but we appreciate the information.
This one turned out to be a bit of a surprise:
We had actually expected a majority of users to be raising row crops – it was surprising to see so many folks doing livestock production. This, of course, is why we ask – if we knew all the answers, we wouldn’t have to. Individual write-in responses here were “Do not farm,” “Recreational prop,” “Hoa security,” and “1.”
OK, this is our survey, and we make WiFi – the surprising part of this is that, apparently, 6.7{6d84e97b9d70a88c7827a68919bdc428927c26a1a62ff29e804188d6763d834c} of the folks are not aware of WiFi. That’s… interesting. We really did want to see how aware of other Wireless Farm Networking technologies people are.
This is about as expected. Not all the recipients of the survey are current Ayrstone customers, so not all of them have outdoor WiFi. It’s quite interesting that everyone in the AgTech industry is talking about LoRaWAN, but nobody out in the field seems to be using it. It was also interesting to see that 4 people indicated they had private cellular coverage – we’d love to talk to you more about that.
This is about what we expected. Should we have included other options? Past surveys and conversations have reflected that these are the major current uses, and we expect that Robotics and farm automation will become a major driver for wireless networks on the farm.
Now, this we found interesting. We have known for a while that security continues to be a concern for farmers, but this is fairly overwhelming. We are always on the lookout for good security devices that are suitable for the rural environment, and we’re continuously disappointed at how few good options there are. We’re going to really look harder in the coming months and see if we can’t find (or even build) better security products for our customers.
Finally, we just wanted to give everyone a chance to tell us whatever they have on their minds that we didn’t ask. Sometimes this leads to interesting insights:
Is there anything else you’d like to tell us about Wireless Farm Networking? 3 responses
I’d like to expand uses but at present time I’m limited.
would add cameras to barn if we had expanded coverage
no
So, there you have it. We are very grateful to all the people who took the time to respond – I hope you agree that the responses are interesting.
We enjoyed putting this survey together and getting the responses, and Google’s survey tool make it very easy and efficient – we’re grateful to Google, and we’d like to do more surveys like this in the future.
What do you think? If you have any ideas, complaints, or comments you really want to share with us, please send them to [email protected] – we really do enjoy hearing from you! Are there products or services you’d like to see us bring to market? Should we do more surveys like this (and share the results)? Should we have done another April 1 prank? Let us know!
We still think WiFi is the easiest and least expensive way to build your Wireless Farm Network. However, we had a meeting recently with a company that’s taking an interesting new approach using private cellular technology.
I wrote in this blog a while ago about WiFi vs. private cellular, and I said that private cellular was a viable option but probably not as practical as meshing WiFi for farm use.
I mentioned cellular in my recent blog post about Wireless Farm Networking, but I focused on public cellular networks, and I still think what I wrote there (not under control of the grower, expensive, inconvenient) is valid.
Private Cellular using CBRS
The folks I talked to last week are setting up private cellular networks on farms using CBRS equipment that can be tied to the farm’s existing Local Area Network (LAN). They set up and maintain the equipment wherever you want it, and a single cell tower can provide good access up to a mile away – potentially much farther than a single WiFi access point.
This overcomes several of my criticisms of private cellular:
Locality – if the private cellular network is connected to the same network as the rest of the farm’s equipment, everything on the farm can “talk” to each other with minimal latency (time spent in transit). This is both a matter of convenience (you can print an invoice from out in the fields on your printer in the farm office), but it will become extremely important as we have more autonomous machines on the farm that need to “talk” to a central server and to each other to coordinate. High bandwidth (like what’s offered by cellular or WiFi) and low latency are key to making autonomous machines work – having to go “to the cloud” on the public network means that those machines will be waiting much longer to get those critical messages.
Control – one of the key “selling points” of the AyrMesh network is that you control where you expand the network, not the cellular carrier. Using a private cellular network, you can determine where the network goes. This is crucial – whether WiFi or cellular, the network is worthless if it isn’t where you need it!
Subscription fees – on a WiFi network, of course, you can add as many devices as you want (within the capacity of the network) by just filling in the SSID and passkey on the devices. On a cellular network, you have to use SIM card (or eSIM), and the cellular carriers want you to charge you a monthly fee for every device you add to their network. However, on a private network, you control the SIM cards (and the company we met with is dedicated to helping you manage them).
I think this makes private cellular using CBRS a viable alternative for your wireless farm network. Is it the best alternative? I think that depends quite a lot on you and the nature of your farm.
Pros and Cons
Because of the nature of cellular equipment, they have to be responsible for all the installation and maintenance. Our approach to meshing WiFi has always been pretty much “DIY” or leaving our customers to find appropriate installation support, because AyrMesh equipment is very simple. However, we do receive requests for referrals to local installers. Additionally, per my earlier post about “get it in the air,” many growers probably should think about building more permanent infrastructure for their farm networks, and that is a task that might better be contracted out.
Private cellular uses “B48 LTE” band at 3.6 GHz., and almost all modern phones and cellular-equipped tablets and laptops can connect to that band. Installed at a good height, a single CBRS radio will cover a lot more ground than a single WiFi access point – you should be able to use it up to a mile away on a phone, whereas An AyrMesh Hub can typically only reach a few hundred yards to a phone. On the other hand, older cellular devices and a lot of “IoT” cellular devices (4G cameras, IoT boards like my favorite “Particle” boards) cannot connect to B48. This is likely to change as CBRS becomes more common, of course.
Please Help!
We’re very interested in what you think about this – is private LTE cellular an interesting option for you? What other options would you like to see? Please comment below or you can take our quick survey.
Ummmm… maybe not for the farm… (Image by jotoya from Pixabay)
A Wireless Farm Network is simply a wireless data network used to move data around on a farm. Do you have a Wireless Farm Network? Do you have more than one? Do you need one? Do you need more than one?
You may be thinking, “a WHAT??? Is this the new buzzword from some Silicon Valley company that’s going to be gone in a week?”
But it’s not a buzzword or an advertising slogan; I argue that it will be as indispensable as the tractor, but something you will use all the time, in-season and out. In fact, you may already have one or more Wireless Farm Networks.
The Past
When we started on AyrMesh 15 years ago, people scoffed at the idea of a wireless network to cover an entire farm. “Why would a farmer need WiFi?” was a frequent question we received, and we patiently explained to anyone still listening that farming was going to become much more data-driven and much more automated over time. Farmers would need networks to move that data and enable automation, and the world has pretty much settled on Internet Protocol (IP) as the normal way to move data. Burying Ethernet cables and fiber across the farm is not really practical, so farms would be using wireless networks, and WiFi is simply the only feasible choice.
Freewave 900 MHz. radio (courtesy of Freewave)
The funny part is that a lot of farmers already had rudimentary Wireless Farm Networks even then. I had come out of the auto-steering industry, and we had used 900 MHz. data radios to transmit corrections from RTK bases out to the “rover” units on tractors, sprayers, and combines. We even made “repeater” units to enable a very rudimentary “mesh” with those units. Some farmers used those same radios (which connected to RS-232 serial ports) to monitor weather stations, soil moisture probes, and to control irrigation systems.
Early soil sensors
In the mid-2000s, some vendors started to come out with soil monitoring systems based on 802.15.4 (Zigbee and others) meshing – very low-power, low-bandwidth intended for home automation. It was somewhat useful, especially for smaller operations and specialty crops, but quite a number of companies went out of business trying to make a market for these products.
LoRa logo
Later, a company called Cycleo introduced products similar to Zigbee (low-power, low-bandwidth) called “LoRa,” but, instead of using meshing, they used good antennas and very low bandwidth to achieve very long range – up to 6.2 miles (10 KM). Cycleo was acquired by Semtech, which put a lot of marketing push behind LoRa and LoRaWAN. Several companies have adopted LoRa as a farm network of sorts for communicating to very low-power, low-bandwidth devices like sensors and simple controllers, and it works very well for sensors and other devices that need to run for long times on batteries and don’t need to use much data.
In 2010, Ayrstone introduced our first generation of AyrMesh Hubs for meshing WiFi, with the current Hub2 line coming out in 2013. WiFi has the advantages of being:
Low cost – WiFi access points like the AyrMesh Hubs are based on very high-volume chips and designs, so can be made quite inexpensive
Standard – There are a lot of things that can use WiFi – phones, tablets, laptops, cameras, sensors, actuators – because it’s an international standard, there are myriad vendors for the base technology (WiFi radios) that can be integrated into literally millions of products
High Bandwidth – Even long-range WiFi like AyrMesh can achieve bandwidth in the tens of millions of bits per second (Mpbs), much more than the thousands of bits per second (Kbps) like the old data radios or hundreds of thousands of bits per second like LoRa.
Low latency – since WiFi uses an IP network, devices on the network can “talk” to each other, as well as to the Internet, and latencies (the time it takes for data to get from one device on the network to another) are typically a few milliseconds.
Familiar – everyone has WiFi in their homes, businesses, stores, cafes, restaurants, and many cities even have municipal WiFi for public use. Everyone has it and knows how it works.
The Present
Currently, all these technologies are still in use, in varying degrees. There are still 4800 and 9600 “baud” data radios on some farms and there are still some “Zigbee” networks out there, but they are disappearing because they have been eclipsed by more modern technologies. Perhaps more importantly, most of those radios were designed so they’d only work with the same vendor’s radios, and most of the vendors for these systems have stopped building those products or gone out of business, so replacements are unavailable.
Cellular has become a viable alternative in some places, but, first, the cellular network is not under the control of the grower, it’s under the control of the service provider, so they decide the coverage and the available bandwidth. Also, every device using the cellular network requires a “subscription” with the carrier, and those costs can add up very quickly. Finally, cellular data goes directly to the public Internet; there is no option to keep your data on the farm. You may be able to pull your data off “the cloud” and onto a device on your farm, but it will have to go up to “the cloud” somewhere.
Recently, satellite connections have come to market as an alternative – I know of at least one autonomous sprayer company using satellite data communications. While satellite data solves the problem of having to be close to a cellular tower, they require clear line-of-sight to the sky, which can limit effectiveness in some situations. All devices connecting to the satellite also need subscriptions, so this cannot be an effective solution for applications requiring significant numbers of devices (e.g. soil sensing).
While LoRa and other low-bandwidth modes may be useful for some situations (again, soil sensing as an example), there are still important reasons to have a WiFi network. A WiFi network can provide “backhaul” for a LoRa-type network, so the LoRa gateway does not need to be connected to the cellular network, as is common now. As noted earlier, there are many, many devices that can connect to WiFi, from phones to security cameras to weather stations and other sensors. Very few devices can connect to LoRa, and the vendor may exclude devices other than their own from connecting to their network. Once you have a WiFi network across your farm, you have a lot of flexibility for easily adding a lot of different devices from a wide variety of vendors because WiFi is a global standard.
Importantly, WiFi is still evolving – modern 802.11ax (WiFi 6) is fully compatible with older versions of WiFi like 802.11n, but offers greater efficiency for improved bandwidth and reliability. 802.11ax also includes features like Target Wait Time (TWT), which allows battery-operated devices like sensors to connect while using minimal power, much like LoRa, effectively eliminating the need for a second “sensor network.” Building your Wireless Farm Network now will give you good connectivity today, and future-proofing for tomorrow.
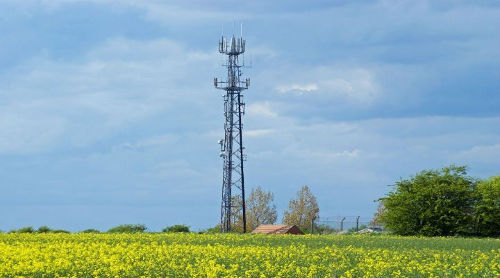
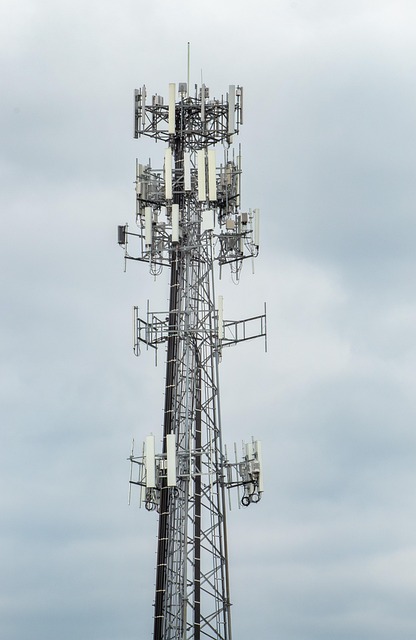
There is a danger of different products using different networks, leading to the presence of numerous Wireless Farm Networks on a farm. Vendors have wanted to be able to “own” the entire installation for their products, including the wireless network they use. The upshot is that you can end up with one wireless network for soil sensors, another for your grain bins, another for autonomous machinery, etc. The end result is a tower like the lead graphic for this blog post: a Gordian Knot of complexity, with vendors fighting each other (and blaming each other) and no control for the grower.
I want to encourage all AgTech vendors, and I want farmers to encourage the vendors they work with, to simplify and use WiFi as the wireless network (or at least an optional wireless network) for new AgTech products. If a product depends on cellular data connections, recognize that limits its usefulness for the vast majority of farms and build in an inexpensive, universally-applicable WiFi alternative. We’ll help. Similarly, if your product is using LoRa, look at using 802.11ax instead to drive down cost, complexity, and vendor lock-in.
I’ll be at World Ag Expo next week; if you’re going to be there, please drop me a line at [email protected] and let’s try to meet up.
We have always focused on the longest range in the AyrMesh Hubs – best possible range to any given WiFi device, as well as maximizing the range (distance) between the Hubs to cover the maximum area.
And that has worked really well – tens of thousands of people across North America have gotten AyrMesh Hubs and have set up WiFi networks on their farms to enjoy outdoor WiFi for convenience, security, and productivity.
A small number of customers have been frustrated by the Hub’s long range, however, because the AyrMesh Hubs do not work well if they’re too close together. Some customers have more intricate central areas on the farm where they need to have several WiFi access points to “fill in” around buildings and other structures. It’s usually impossible to successfully place the AyrMesh Hubs within half a mile of each other, and that was much too large a span for many of these facilities. By reducing the power, we could enable customers to put the Hubs within 400 yards of one another, but, for many customers, that was still too far apart to support their physical plant.
AyrMesh HubDuo Modes
Because the AyrMesh HubDuo has both long-range 2.4 GHz. and high-bandwidth 5.8 GHz. radios, we have the option of moving the meshing from the 2.4 GHz. signal to the 5.8 GHz. signal, which allows the HubDuos to be placed much closer to one another – as close as a few hundred feet.
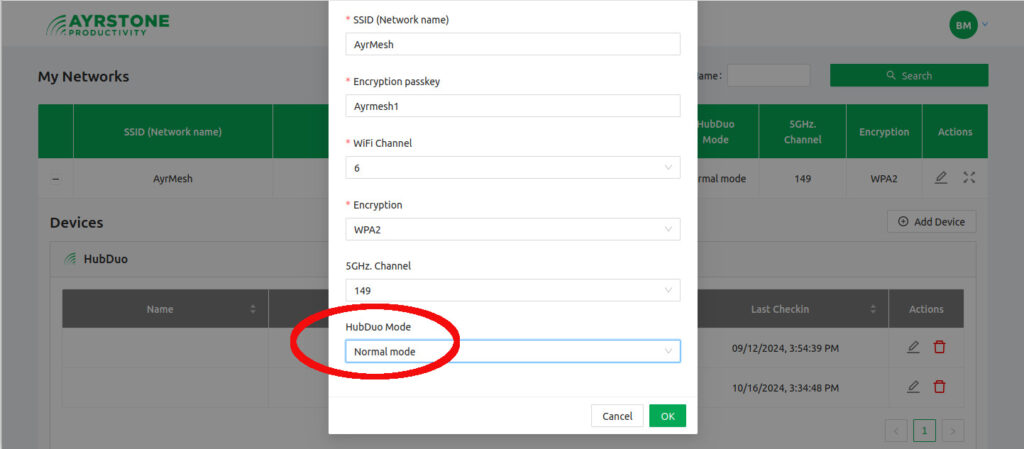
To support this, we have introduced four “modes” for the AyrMesh HubDuo, selectable in the “Network” section of your account on AyrMesh.com:
Normal mode – Compatible with the AyrMesh Hub2 series (Hub2n, Hub2T, Hub2x2, Hub2x2C) – meshing on the 2.4 GHz. signal. This mode works just like the other AyrMesh Hubs, with the addition of a 5.8 GHz. WiFi signal for shorter-range higher-speed connectivity.
Close mode moves the mesh signal to 5.8 GHz. so the HubDuo units can be placed much closer together. Transmission signal strengths are reduced, to avoid having the Hubs “overwhelm” each other when they’re closer. Both the 2.4 GHz. and 5.8 GHz. WiFi signals are available for use.
Hybrid mode makes both bands available for mesh signals on the Gateway Hub, with Remote HubDuos only meshing on the 5.8 GHz. mesh. This allows a close-in mesh of HubDuo units meshing on the 5.8 GHz. signal and a further-away mesh of Hub2 units on the 2.4 GHz. signal.
Access Point Only mode – this mode turns meshing off entirely. This is useful in cases where existing infrastructure exists to distribute connectivity around the area and only outdoor WiFi is needed from the Hubs.
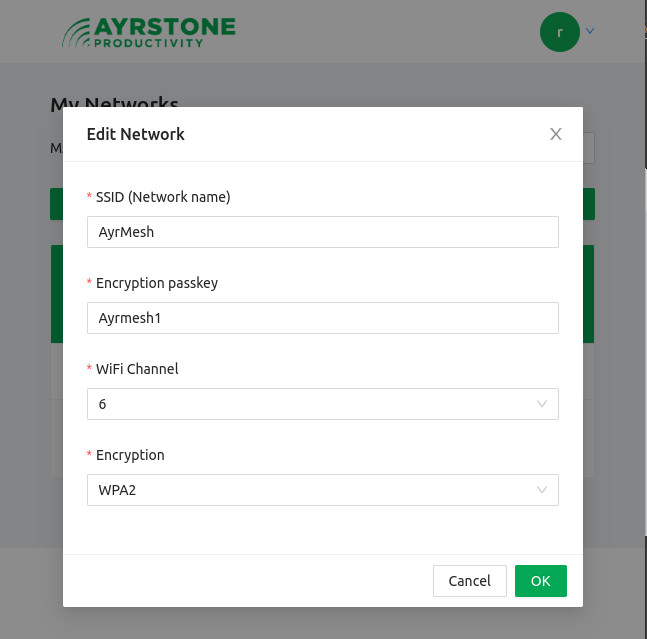
It’s very easy to select the HubDuo mode in AyrMesh.com – under “My Networks” click on the pencil to edit your network settings. At the bottom of the panel, you’ll see “HubDuo Mode” – select the mode you want from the dropdown menu.
To make it easier, we’re offering 15{6d84e97b9d70a88c7827a68919bdc428927c26a1a62ff29e804188d6763d834c} off Ayrstone AyrMesh Hubs, Receivers, IndoorHubs, and Bridges until the end of the year. Just use coupon code “ayrxmas” on your order on Ayrstone.com.
Happy holidays to all – we’re looking forward to a great 2025!
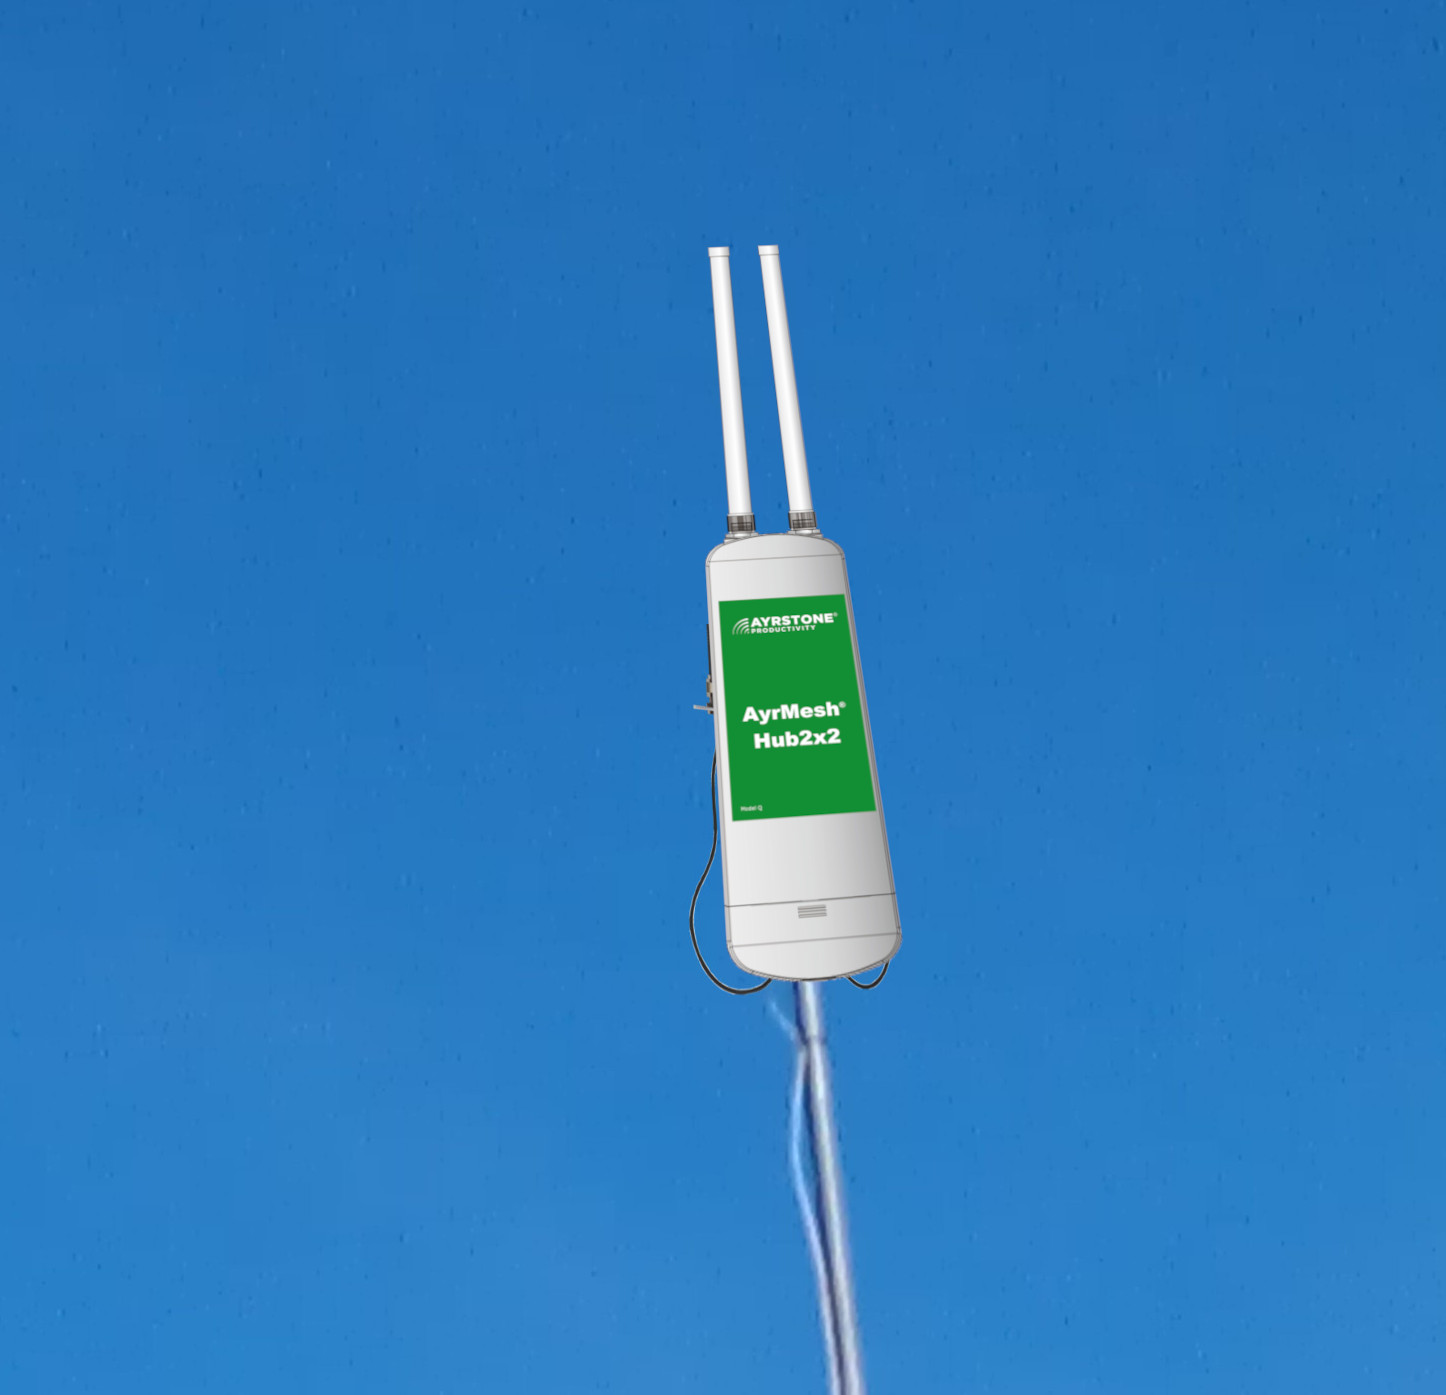
We are very pleased to introduce a new generation of AyrMesh Hub – the new AyrMesh HubDuo! If you order between now and October 31, you can get $30 off our special intro price of $349.95, bringing the price to only $319.95 – please use coupon code “hubduointro” for the extra discount.
The HubDuo is the first AyrMesh Hub to feature dual-band WiFi – using both the traditional 2.4 GHz. band and the 5.8 GHz. band for higher bandwidth combined with the same long range as the rest of the AyrMesh Hubs.
The HubDuo uses a single SSID (network name) for both the two WiFi radios. The result is that you can connect to the 5.8 GHz. WiFi when you’re close to the Hub and get up to 100 Mbps bandwidth (speed). Then, when you move away from the Hub, your device will automatically move to the 2.4 GHz. WiFi, where you can get up to 65 Mbps, with bandwidth reducing as you move further away.
The ultimate range of the Hub is similar to the rest of the AyrMesh Hubs, because it still has high-gain antennas to “hear” very faint signals from a long distance away. So there’s really no tradeoff – you get the same long range as the rest of our Hubs with the extra benefit of blazing-fast speed at short range.
The other main benefit of the AyrMesh HubDuo is that the output power can be adjusted so the Hubs can be placed much closer together than our other Hubs. Whereas the Hub2x2 and Hub2T need to be generally be placed at least a mile apart (so they don’t overpower each other), the HubDuo can be places as close together as a few hundred yards with proper adjustment. Just contact Ayrstone support if you need to place the Hubs less than half a mile apart and we’ll adjust the power.
The HubDuos use standard 802.11s meshing, so they will mesh with existing AyrMesh Hub2 devices (Hub2x2. Hub2T, Hub2x2C, and even the Hub2n). The HubDuo makes a great replacement Gateway Hub for your existing AyrMesh network. The HubDuo also makes use of the same external housing we used for the AyrMesh Hub2x2C, making it compact and easy to install and maintain.
We have plans to offer additional features for the AyrMesh HubDuo to give you even greater flexibility in deploying them, including the option for even more “dense” installations. Please watch this space for news – the new generation is going to open new frontiers in wireless farm networking.
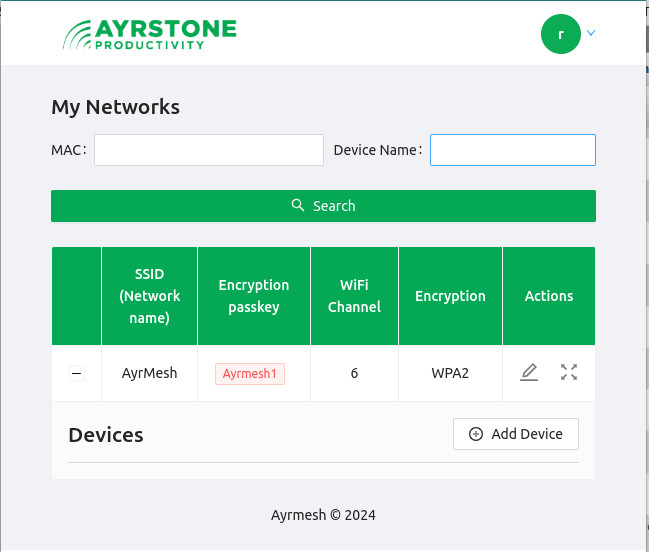
As mentioned a few weeks back, we have been working on a new version of AyrMesh.com, with a new interface and new capabilities to support upcoming products. For existing customers with our current products, the interface is a little different, but the features are largely the same. Shown above is the “Network” portion of the interface, where you can use the “pencil” tool to the right to change your network settings: SSID, encryption passkey, channel, and encryption type. The “four arrows” icon to the far right allows you to set or rescind permission for another user to manage your network.
The “permissions” part of AyrMesh.com has been there for years, but is not well-understood. There are a few reasons you might want to give someone permission to manage your network:
You may have someone helping with your networking, and giving them permission to manage your network will help them see problems.
Similarly, you may be helping neighbors with their networks, and having them give you access to their networks will help you keep things working
Many people have multiple AyrMesh networks, either at multiple locations or, in some cases, multiple networks at a single location (e.g. one network for use with phones, tablets, and laptops, and a separate network for security equipment like cameras). By assigning control to a single AyrMesh.com account, they save time managing the multiple accounts.
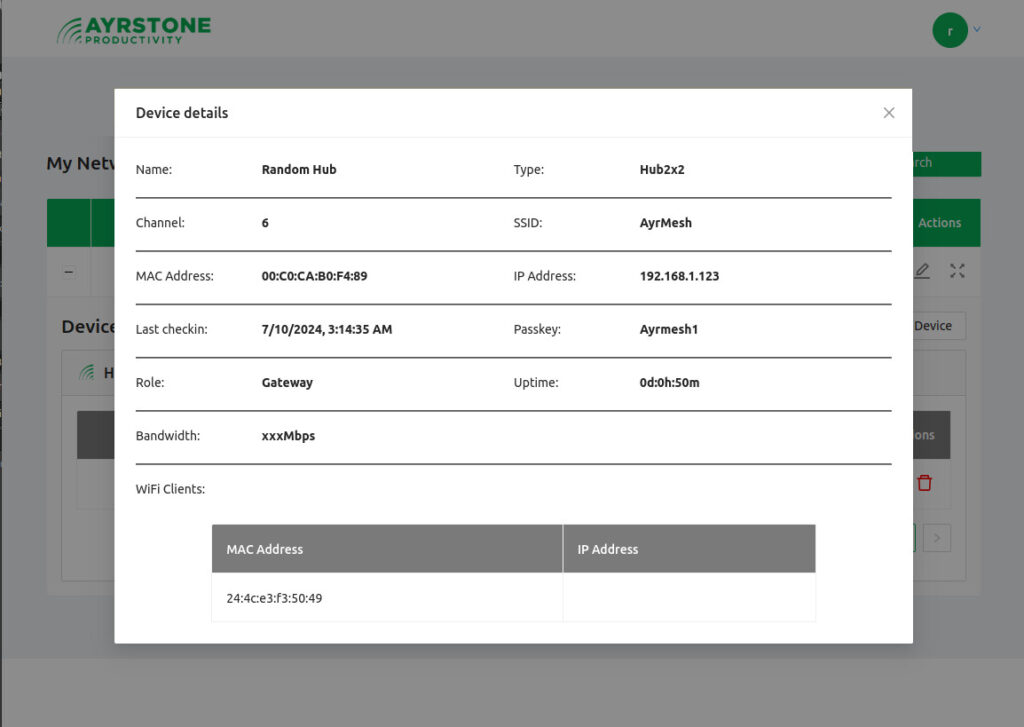
Next down is the Device section – for simplicity, we’re just showing a single Hub2 device. If you click anywhere on the line for the device, you’ll see the details for that device:
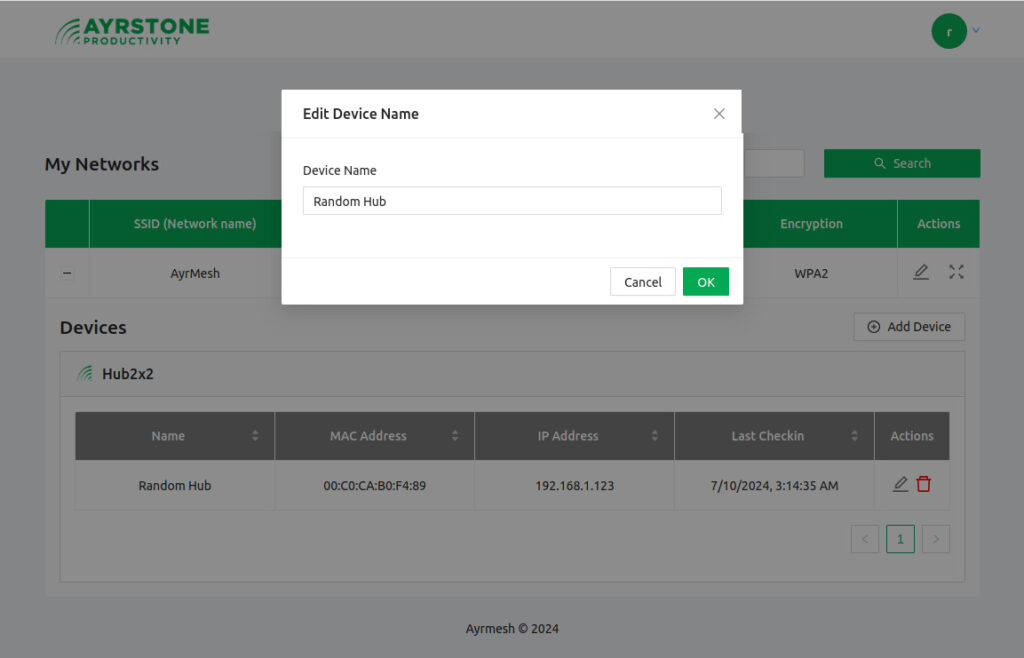
Clicking on the pencil icon to the right of the device allows you to change the name of the device. This name is just for convenience – it does not affect the SSID or any functional part of the Hub, it just provides a name that’s more convenient than referring to the Hub by its MAC address:
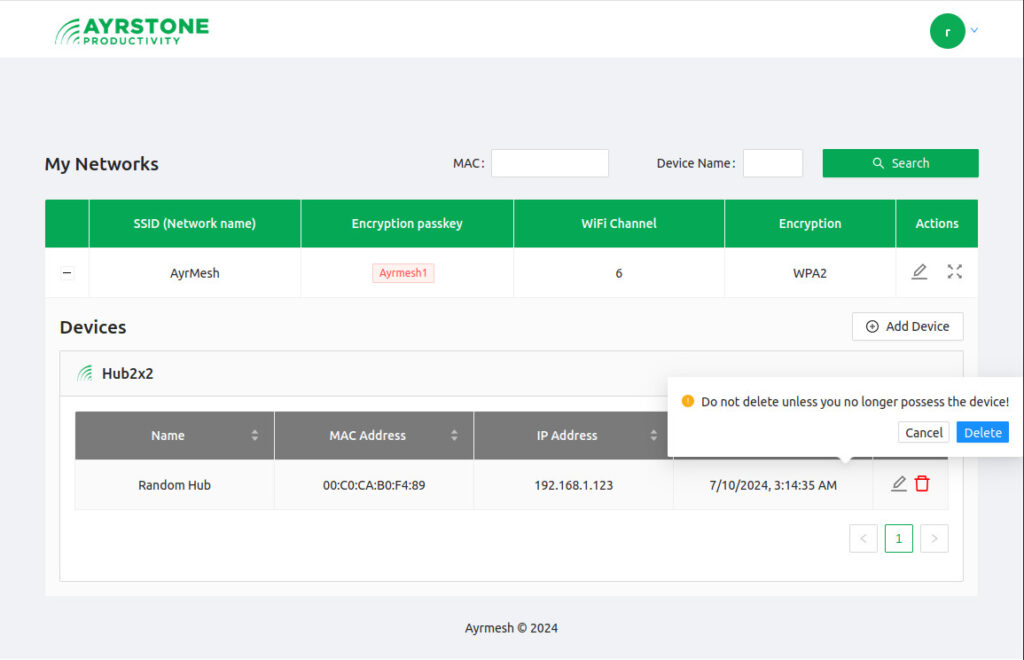
To the far right is a “trash can” icon, which is used to delete a device from your account. DO NOT delete a device from your account unless you no longer possess that device – deleting a device that’s still in your network can make troubleshooting that device much more difficult. The most common reasons for deleting a device are:
Deleting a device that was incorrectly added
Deleting a device that has been sold, given away, or exchanged
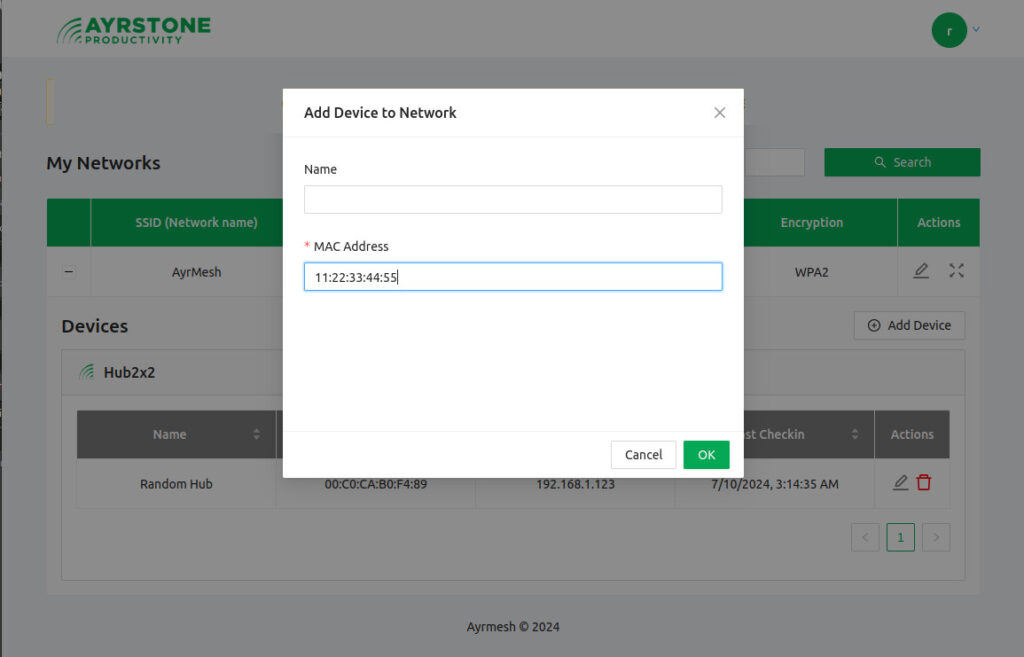
Finally, of course, you may need to add a device manually if it does not appear automatically in your account. Click on the “Add Device” button and fill in the device’s MAC address (from the label on the device):
You can also add a device name if you choose.
AyrMesh.com will change over time, with new features being added to support new products and new capabilities. Of course, we always welcome your comments!
We have been working on a new version of AyrMesh.com, with a more modern look, simpler navigation, better management tools, and support for new, upcoming products.
We wanted to show you some early screenshots and let you know that it’s on its way. While the look is changing, the essential underlying functionality will be the same.
The new opening screen is similar, but simplified and with better differentiation between our products. The goal is to show the information you need to set up and manage your AyrMesh network as easily as possible, and minimize the amount of spurious information.
The primary network information is shown up-front now, with a simple “click the pencil” to edit the network parameters (SSID, encryption passkey, channel, and encryption type):
If all goes well, the new AyrMesh.com should be up in the next couple of weeks. We’ll do a more complete blog post, showing all the new features, and post on social media when it’s ready to go.
Of course, if you have any questions or comments, please let us know.