I have a Google Alert for “Wireless Farm” – I get about an article a week (and many of them are about wireless technologies for “server farms” and other odd things). But today I got a link to this article about “How 5G will impact the future of farming.” Intrigued, I clicked it to find a puff-piece about how Deere wants better wireless connectivity so that combines can “talk” to each other via “the cloud,” pointing out that it can take up to a minute with current technology for one combine to upload its data to the cloud, then the other combine to download that data and act on it. A couple of points here:
“5G” mobile technology is based on “millimeter-wave” bands – over 20 GHz. (20,000 MHz.). Current LTE is based on 700 MHz. radios, and previous mobile data technologies (2G/3G) were “piggybacked” on existing 800 MHz. and 1900 MHz. radios. The range and, in particular, the ability of a signal to penetrate solid objects varies inversely with the frequency. So, to have 5G covering the areas cellular covers today requires a MUCH higher density of cellular towers than we have; to have it cover all of the rural U.S. will require thousands and thousands of new towers, a huge infrastructure investment
As I have mentioned previously, the vast majority of cellular infrastructure investment is happening (and will continue to happen) within cities and towns, where the density of opportunities for subscriber revenue makes it profitable.
Within the article, however, is this paragraph:
The term “5G” refers to the fifth-generation wireless broadband technology based on the 802.11ac standard. The packet of technology will bring speed and coverage improvements from 4G, with low-latency wireless up to 1GB/s.
802.11ac is WiFi, not mobile (cellular) technology. Specifically, it is the current generation of WiFI using the 5.8 GHz. (5,800 MHz.) radio band.
And here’s the point: “5G” mobile technology is not going to have an impact on farm operations in the forseeable future. But you can have multi-megabit WiFi technology on your farm TODAY – and you don’t have to wait for your friendly cellular carrier to put up a zillion towers. FURTHERMORE, since your AyrMesh system puts all the devices onto YOUR OWN Local-Area Network (LAN), everything on the system can just talk to each other – they don’t have to upload to the cloud and download from the cloud or anything like that. Your combines can “talk” to each other and your trucks, you can automate processes and enable autonomous vehicles – NOW – with an AyrMesh WiFi network.
In Part 1 and Part 2 of this series, as well as the associated posts on the ezeio and sensor networks, I have focused primarily on IoT hardware: the part you can see and touch, and that touches your farm.
However, in many ways, software is much more important than the hardware. As I observed in Part 2, modern technology products are remarkably similar: a CPU, some memory, some storage, and some peripherals. If the peripheral is a relay, you have a device that can turn things on and off (like a remote-controlled power plug, or a WebRelay). If the peripheral is an “Analog to Digital Converter” (ADC) then the device can monitor sensors and report the values from those sensors. Some devices like the ezeio have both (and even more).
Of course, nothing happens on these devices without software. And software is involved in at least two important places: the software that is running on the devices themselves, sometimes referred to as “firmware,” and the software running on back-end computers (local or cloud servers, PCs, or even your phone or tablet) that is used to store and interpret the results from the devices.
These two pieces of software have to be able to “talk” with each other, and we’ll assume* they do so over your network, with the device connected to your AyrMesh network and the “back-end” software on some sort of cloud-based server on the Internet. Note that the “back-end” software COULD reside on a server on your property if you are using AyrMesh.
What the devices themselves do depends on both the hardware and the firmware on the device – in most cases, that firmware will collect readings from the sensors, upload that information to the back-end server, and, if appropriate, take commands from that server and take action, from turning on a light to starting a pump or a grain auger.
In most cases, that firmware is a closed system – there is no way for you to collect data off or communicate with the device directly, or to direct it to a location other than the vendor’s cloud server. It doesn’t have to be that way, but (1) it’s simpler, and (2) that gives the vendor much more control over the data.
The back-end server usually stores the data and presents it to you (either through a web page or a mobile app, or both). What data you see, how you see it, and what you can do with it depends on that back-end software. It may just present a time series of observations in the field as a graph, it may let you set up simple or complex rules (if the soil moisture is at this level or below, turn on the irrigation system), and it be able to present data in many useful ways (different graphs, superimposed on maps, etc.) and enable very complex control of your farm machinery.
The back-end server is usually a closed system, as well – most times it can only accept data from the vendor’s own devices. Sometimes it may have an “Application Program Interface” (API) that allows it to exchange data with other programs. It may also have the ability to upload data into it for tracking and presentation, or to download data from it for importation into another program. These APIs and import/export mechanisms may be very good, well-written, and well-documented, making them extremely useful. Or they may not. APIs are generally only useful for programmers – it takes code to make them work – but well-written and well-documented APIs can enable even relatively inexperienced programmers to create custom programs to do exactly what you want, and that can be extremely valuable.
On the other hand, back-end software without good APIs and/or import/export features is a “closed box” – what you get is just what you get, and there’s no way to get more or less. Understand, of course, that a closed system like this may do EXACTLY what you need, but, if your needs change, it may suddenly become useless.
Of course, there is also the issue of your data and what happens to it. The terms and conditions for the service may be very clear about what happens to your data, or they may be quite vague. Many of the data services will anonymize and sell the data that you store on their servers (the most unethical may not even anonymize it – beware!). This may concern you or not, depending on the nature of the data and how closely tied to your operation it is. For instance, it is generally valuable to share weather data – if your neighbors do so as well, you can gain a much better insight into the local weather patterns. On the other hand, you may not want to share geo-referenced harvest data – that tells too many people exactly what your land and your harvest is worth. “Fuzzing up” the geo-reference, however, might make it a lot more shareable.
When you are considering new devices to collect data and/or control machinery on the farm, these distinctions between “open” and “closed” systems, and the availability if good, usable APIs may seem abstract. Salespeople for “closed” systems will do their best to minimize the importance of these issues, but it’s absolutely critical. Openness in the device’s firmware means that the devices can be re-purposed to work with another system if you don’t like the vendor’s services, and openness in the back-end database means you can easily get your data and move it where it can be combined with other data and used (e.g. providing it to your agronomist for analysis, or storing it in a system where it can be combined with other data for decision-making).
Being smart about buying new technology for your farm can save you a lot of money in the long term, and a lot of frustration in the short term. We’ll keep an eye out for and report on interesting products that help you on the farm using open technologies.
*some devices connect directly to the network using WiFi or Ethernet, and some devices will have low-power networking (e.g. Zigbee or Google Threads) that use a “gateway” device to connect them to your network (or directly to a public network via cellular or satellite). There are even some that don’t talk to the network at all, using either Bluetooth or an embedded WiFi server to communicate directly with your phone, tablet, or laptop. And, of course, there are still devices that use some sort of flash memory and “sneakernet” (taking the flash memory off the device and walking it to a computer).
Since we started marketing the AyrMesh system five years ago, we have gotten inquiries from folks who have large houses, offices, and small hotels/motels – can AyrMesh work indoors? The answer, of course, is that it can work, but it’s not optimal for a number of reasons, and we do not recommend it. AyrMesh is designed for outdoor use, mainly in rural areas.
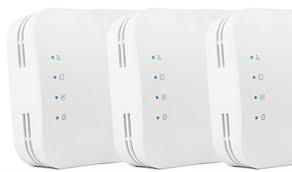
We have been able to recommend the fine Open-Mesh products for indoor and urban outdoor use, but some new products have recently entered the market.
Eero was the first in this space, with a very nice-looking product and very good technical specifications. Unlike Open-Mesh, they do not have any way to mount their units outdoors, and they only offer one model (available in a 1-, 2-, or 3-pack).
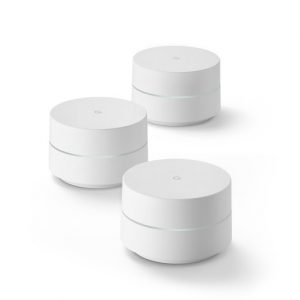
Then, this week, Google announced the new Google WiFi product, utilizing a very similar approach of very nice-looking indoor meshing access points for larger houses. The Google WiFi products will be available in November, but they can be pre-ordered.
Open-Mesh uses their Cloudtrax website and apps to control their access points; we have used Open-Mesh here in the Ayrstone lab for years and found it to be excellent. It’s a fair bit more complicated than AyrMesh, but it has the more “commercial” features you might want for a business or a motel, and the more complex features are easily ignored for a home setup.
It’s worth mentioning that there have long been WiFi Repeaters (also known as “boosters” and “extenders”) that connect to your WiFi router and create a new WiFi signal, and devices like the Apple Airport routers that use “Wireless Distribution System” (WDS). Although a single repeater can work well, and three Apple Airport routers using WDS (one connected to the Internet and two “extenders”) can work, they don’t have the routing “smarts” of a real mesh network, and they can cause more problems than they solve. For a large house, a real WiFi meshing product like these will provide much better results without running Ethernet cables… of course, for the absolute best WiFi, there is no substitute for just running Ethernet and putting separate Access Points in each location you need WiFi. If you were clever enough to run Ethernet to the far reaches of your house before the drywall, all you have to do is plug in some dumb access points in the Ethernet – no need to mess with the indoor mesh.
The new Eero and Google WiFi products use apps to configure and control the network – I don’t know if there is a website option available, but I get the impression that the apps are the only way to control them. I don’t know about you, but my poor phone is “full” of apps, and I really don’t want another one.
So my own view is that these new players are not quite as good as what already exists in Open-Mesh, but, of course, your mileage may vary, Of course, they are being marketed like crazy, so you’re going to see them in the press all over the place.
What I think is important is that meshing WiFi is becoming mainstream, and, if you live in a large house, you don’t necessarily have to run Ethernet to get WiFi throughout the house.
There are all kinds of new technologies and products available for farming – these new “AgTech” products hold real promise to change the practice and the economics of farming. But you have to evaluate them realistically to understand how they will help you improve your profit: increase revenue or save costs.
AyrMesh was designed specifically to help save costs on the farm, so it provides increased profits no matter what happens to yields and crop prices. There are several ways in which AyrMesh helps you reduce costs, directly or indirectly:
Reduce the cost to simply move data – your cellphone (and maybe your tablet and/or laptop) has a cellular radio for data, and you pay a premium for using more than a minimal amount of data per month. By using the AyrMesh network, however, you can be disconnected from the cellular data network and save money you would have to send to the cellular companies.
Employ new technologies that can save money – because AyrMesh is a standard, Internet-Protocol (IP) network, you can avail yourself of off-the-shelf products that just connect to your network. Examples include things like networked weather stations and soil sensor systems, but also grain dryers and irrigation systems. As security becomes an increasing concern on the farm, having an AyrMesh network allows you to quickly and easily place IP cameras so you can keep an eye on distant parts of the farm
Be prepared for the future – new, time-saving and money-saving products are coming up fast, and you can be ready to put them to work. New autonomous vehicles, remote sensors, and remotely-operated machinery will be able to magnify the effort you put in on the farm, just like tractors and combines did in the late 1800s, increasing the profitability of farms.
But be careful: a lot of products being sold come with a “small monthly fee” to pay for a cellular modem to move data from the device to the company’s cloud servers. It’s a business model that works and it makes it easy to install new products, because the vendor doesn’t have to worry about setting up a network. However, as you adopt more and more of those products, the number of small monthly fees is going to add up fast, and none of them will work in fields without cellular connectivity.
Look, electronics and data aren’t going to grow the crops. But the information they can provide you can help you make better decisions, both season to season and day to day, to save money and increase yields. Smart investment in AgTech begins with thinking about the data – what you can use, how you will use it, and, most importantly, how you will get it from where it is generated to where it is useful. We are here to help with that last bit.
We have been asked multiple times how to extend the AyrMesh network beyond the availability of plug-in power. The key, of course, is solar panels and/or wind turbines, along with batteries to hold the power when the sun isn’t shining or the wind isn’t blowing.
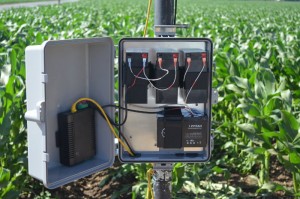
Tycon Power has solved this problem for us by developing an integrated system just for the AyrMesh products: Hub, Receiver, or Bridge radio. The product to use is their RPPL-1212-36-30 unit. You can buy it directly from Tycon at their store site. This system with the 30 Watt solar panel will work in most of the country that receives an average of 3.5 hours per day or more – the red and dark orange bands on the standard insolation map. For areas in the light orange or yellow areas on that map, you will need to add a second 30W solar panel (with mounting bracket) or a wind turbine to keep the batteries charged.
Tycon also makes larger systems for multiple devices. The RPST-1212-100-70 system will provide power for two or three devices – for instance, a Bridge radio and a Hub or two “back to back” bridge radios.
As with the smaller system, if you get less than an average of 3.5 hours of sunlight per day, you’ll need to augment the power generation of that system with an extra 70W solar panel (and mounting bracket) or the wind turbine.
Higher is better
What does it take to set this up? Two things: very rudimentary wiring skills to connect the batteries and the solar panel with the solar controller, and the ability to set up a strong mast or tower. In our tests, we used a 7′ tall free-standing pole, but, for practical use, you’ll want a much taller pole or tower, embedded into the soil with concrete. You need, of course, to get the radios up as high as practical, but at least 25 feet above any obstacles for maximum range. This may require the use of a pole with guy lines or even a tower.
The system provides Power over Ethernet (PoE) for the radios, just like the power supplies that come with the AyrMesh products. The mechanical considerations (attaching the solar panel and battery pack to the pole or tower) is extremely simple, using either U-bolts or hose clamps. Using this to extend your network out into your fields will enable you to use the AyrMesh Cab Hub to automatically move data off your in-cab computers and have WiFi coverage in your cab wherever you are on the farm.
If you have any questions about this, of course, please feel free to comment on this post or get in touch with us at support@ayrstone.com.
I have been saying for some time that the AyrMesh network is the vital element for enabling the “Internet of Things” (IoT) on the farm. Because of this, I supported the Edyn Kickstarter campaign, and my Eden Sensor finally arrived on Friday in a box about the size of one of my shoes. i have been eagerly awaiting it, because I believed the combination of the Edyn system and the AyrMesh network would be a very powerful one for the home gardener or small farmer.
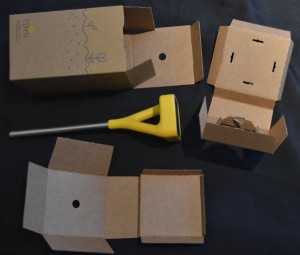
I pulled the box open and pulled out the device – I was very impressed by its relatively small size and apparent toughness – it feels nice and solid. I continued to pull apart the box to find the instructions and found… nothing else. Just cardboard. No instructions at all. Oops…
I took a look at the Edyn website and found very little, so I went back to the Kickstarter page and found the FAQ. It stated that the device is associated to the WiFi signal through the Edyn app, which is available for iOS or Android.
I pulled out my Android phone, went to Google Play, searched for Edyn, and found… nothing. (Note: that has changed in the last few days: the Edyn app is now in Google Play for Android devices).
So then I grabbed my wife’s iPad, opened the app store, searched for Edyn, and found… again, nothing. Then I realized it was only looking for iPad apps; I set it to look for iPhone apps and found it.
I should point out, of course, that none of these things deterred me in any way: I’m the crash test dummy for new devices like this, so I expect it to be rough when I first see it. My goal is to experience these rough spots so you don’t have to!
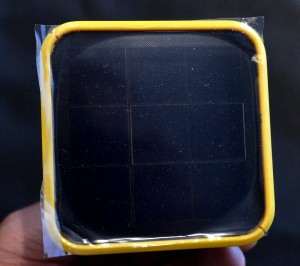
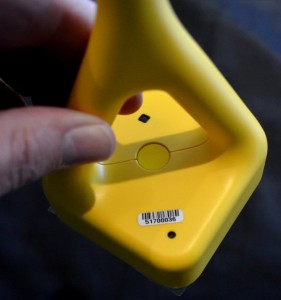
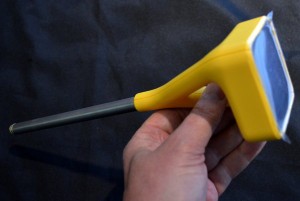
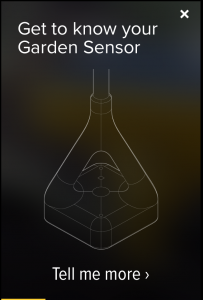
The device itself just comprises a molded plastic top, with a visible solar panel, and a metallic bottom probe with discs of metal and plastic at the bottom for the actual sensing application.
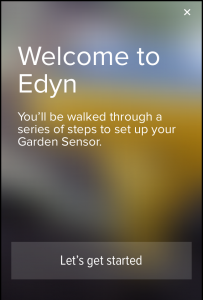
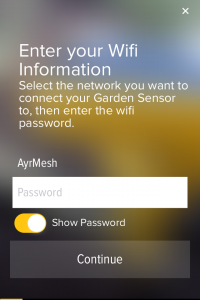
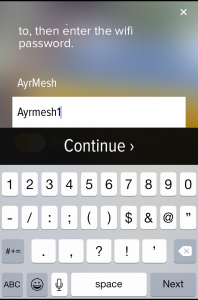
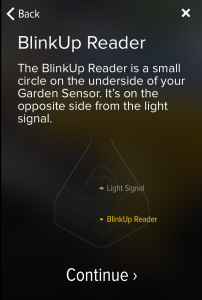
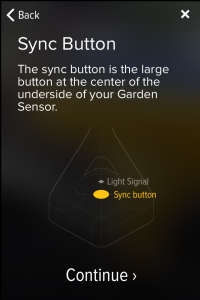
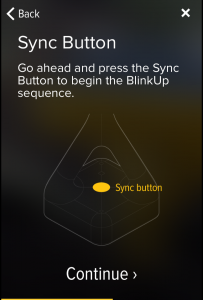
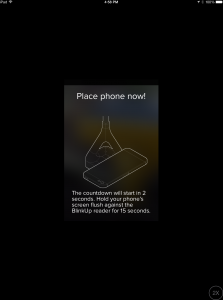
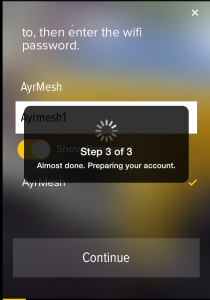
When I finally got the app installed on the iPad and got it started, I was taken through the process of creating an account and configuring the Edyn Garden Sensor. The Edyn is built with a VERY clever WiFi device called an “Electric Imp.” There is, obviously, no keyboard on the Sensor, so you have to get the WiFi configuration onto it somehow, and the Electric Imp uses a process called “Blinkup.” On the botton of the Sensor is a button and a small light sensor; you join the WiFi network (your AyrMesh WiFi network) on your phone or tablet, then type in the encryption passkey (from AyrMesh.com) in the Edyn app. You then hold the screen of the phone or tablet close to the bottom of the Sensor, and the screen blinks to send the WiFi credentials to the Sensor. The Sensor then joins the network, checks into Edyn’s servers (much like the AyrMesh devices do) and then appears in the Edyn app.
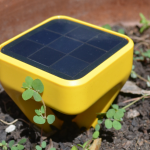
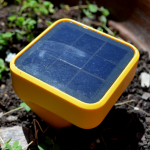
I must mention that, in my case, the Blinkup process was not entirely smooth… the Sensor accepted the password from the iPad, and it actually associated itself with my Hub just fine – I saw it appear in my router’s DHCP table. However, it gave me an error message saying “Uh-Oh. There’s a problem on our end. Please try again.” I tried several times with the same result, then fired off a note to support@edyn.com. They wrote back the following day, and, by that time, whatever the problem was was fixed and my sensor showed up in the Edyn app.
My Edyn sensor has been working just fine in my backyard for several days now – I have it in a pot with a palm I’m trying (unsuccessfully, so far) to revive. A few notes:
I hope they’ll at least include a QR code somewhere in or on the box that leads to some setup instructions. It’s odd to pull the device out of the box and find absolutely no supporting documentation.
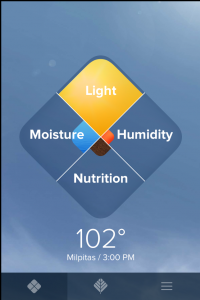
The outside temperature sensor appears to be inside the case. In the final screen below, you’ll see it indicates 102 degrees, but the ambient air temperature was about 80. The humidity sensor seems to work OK, though.
I don’t have enough information to judge whether or not the soil information being provided is accurate. It seems to indicate an increase in soil moisture when I water and it indicates it dries out when I don’t. I haven’t had the soil tested to verify its accuracy about fertility.
Edyn also has an irrigation valve product that connects to a garden hose for automatic irrigation. I don’t have one, so I cannot test that piece – it’s relatively simple technology, so I’d assume it would work well and setup would be the same.
The Edyn system is currently really designed for gardening, not farming. If you have a garden or even a small vegetable farm, for instance, it might be quite useful, but I don’t think it would be very useful on a large, production farm.
The Edyn system is supposed to be on sale in Home Depot and other gardening centers soon.
There is no question about it: the Edyn and AyrMesh systems work well together and should be of significant benefit to gardeners and even smaller farmers.
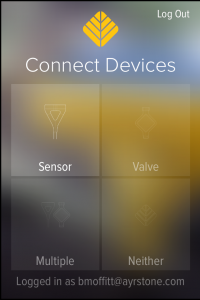
Here are the screens I went through in the setup process:
We didn’t invent the idea of putting WiFi on farms and ranches, although I think we’ve done a lot to popularize it. And it’s not really WiFi that’s important, it’s just having a farmwide network that you can connect to and move data with.
When we started, we realized there were two ways we could build out the farm wireless network, and that we’d need to support both ways. However, we had to start somewhere, and we knew that the best short-term “proof of concept” was using the mesh network approach: a bunch of high-power WiFi Access Points that are connected to the Internet and talk to each other using a meshing protocol. That’s what gave rise to the AyrMesh Hub.
Because the Hubs can be up to 2.5 miles apart, it allows you to extend your network out quite a ways from your home place, and that’s useful for a lot of people. It also allows you to “get in the game” for a minimal investment – a few hundred bucks for a Hub and a little time putting it up high and out in the clear gets you WiFi across your farmyard and out into your fields. Then you can extend the network from there with additional Hubs.
However, sometimes you just want to connect someplace into your network, and you don’t need to have WiFi. For those cases, a different approach is optimal: point-to-point microwave links, also known as “bridges.”
A bridge can use WiFi or a WiFi-like signal to connect two locations and pass data between them. Typically they are “Layer 2” devices, meaning that they work just like a long, wireless Ethernet cable. You plug one radio into your network (typically your router) and then plug the other radio into whatever you want to put on your network (a computer, IP camera, WiFi access point, etc.), and everything works just like it was plugged into your router.
The AyrMesh Bridge uses microwave radios that use the 5.8 GHz. band (used for 802.11 WiFi “a,” “dual-band n,” and “ac”), but they use a special “narrow-band” microwave signal that increases the range, reduces the effects of interference, and makes the signal invisible to WiFi “sniffers.”
Of course, if you are just connecting some distant device or devices into your network, you can also use an AyrMesh Hub and an AyrMesh Receiver. It will actually work the same way; the differences are:
The AyrMesh Bridge is just a wireless Ethernet cable that doesn’t provide a wireless signal usable by anything else. The AyrMesh Hub provides WiFi that other devices can use.
The AyrMesh Bridge is a “1-to-1” system, but you can have several Receivers talking to one Hub.
The Receiver can be up to 2 miles from the Hub, but the Bridge radios can be up to 5 miles apart.
It’s not necessarily an “either/or” thing. Several AyrMesh users are using the AyrMesh Bridge to reposition their Gateway Hub to the top of large structures (e.g. grain legs) to give the Hubs maximum range. A couple of people are using their Hubs for WiFi but providing connectivity to other buildings using Bridges (with the Hub and the Bridge radio mounted next to each other on top of the house or office). And you can use a Bridge connected to a Remote Hub to connect a device several miles away from the Hub.
There are a lot of folks out there selling wireless bridges – we think the AyrMesh Bridge is the best for one important reason: it’s the easiest to set up and use. No configuration is needed: you just connect both radios in the Bridge to your router. They download your configuration from AyrMesh.com and then all you have to do is mount them outside pointing at each other.
It seems like every time you look around there’s a new crop of WiFi routers offering unbelievable speeds and ranges due to the use of a new WiFi standard. Years ago, WiFi started out with 802.11a (back in the last millenium) and then 802.11b, which gave way to 802.11g, which was replaced by 802.11n, and new routers use 802.11ac. And, if you’re wondering, yes, of course there’s a new one on the way, currently called “802.11ax.”
There are also many ancillary standards associated with these, even an 802.11z standard (having to do with extensions to Direct Link Setup, whatever that means). The “a,” “b,” and, to some degree, “g” standards are, for all intents and purposes, obsolete, because nobody has built equipment using those standards for a long time. On the other hand, all the standards are “backwards-compatible,” so the newest equipment can still interoperate with the oldest “a” and “b” equipment.
For us here in the Ayrstone labs, the amusing thing about all these advancements since 802.11g in 2003 is that they are squarely centered on one thing: improving indoor WiFi performance. The reason that amuses us, of course, is that it’s exactly the opposite of what we’re trying to do, improve outdoor WiFi performance. There has been almost nothing done to improve outdoor long-distance WiFi since the 802.11g standard.
Here’s a quick rundown of the various WiFi standards:
802.11 – 1997 – up to 2 Mbps on 2.4 GHz and InfraRed with WEP encryption
802.11a – 1999 – up to 54 Mbps on 5 GHz
802.11b – 1999 – up to 11 Mbps on 2.4 GHz
802.11g – 2003 – up to 54 Mbps on 2.4 GHz, WPA/TKIP encryption
802.11n – 2009 – up to 600 Mbps using both 5 Ghz and 2.4 GHz, MIMO, WPA2/AES-CCMP encryption, wide channels
802.11ac – 2013 – over 1 Gbps using both 5 GHz and 2.4 GHz and extra-wide channels, MU-MIMO
802.11g was the standard that made WiFi useful (effective data rates of over 20 Mbps) and safe. The original WEP encryption standard in 802.11b was fatally flawed and easily broken – we now consider it “anti-security,” because it gives the uninitiated the illusion of security but does not actually deliver any, much like having a door made of paper painted to look like steel. WPA/TKIP encryption is still considered unbreakable (when used with strong passwords), so 802.11g WiFi devices are still perfectly useful.
802.11n added even more unbreakable security (WPA2/AES-CCMP), which is designed for large networks and organizations. It also added MIMO (Multiple Input, Multiple Output), a way of using multiple antennae to increase the bandwidth and increase the range of the WiFi signal, especially indoors. A single antenna senses “multipath” (signals bouncing off the walls and other solid objects) as noise, because they are slightly out of synchronization with signals coming directly from the other station. MIMO antennas can “correct” and re-synchronize those multipath signals, improving indoor performance dramatically in some cases. 802.11n also introduced dual-band capability, using both the 2.4 GHz and 5.8 GHz bands to increase throughput, and “wide” channels – increasing the amount of electromagnetic spectrum used from 20 MHz per channel to 40 MHz. Wide channels increase bandwidth, but at the sacrifice of range. So you can get faster data speeds close to the WiFi Access Point, but speeds will drop off quickly as you move away.
802.11ac is the latest standard, and it adds on top of 802.11n. Specifically, it allows for extra-wide channels (80 or even 160 MHz in the 5 GHz band) and MIMO improvements. In particular, it adds “MU-MIMO” or Multiple-User MIMO to expand the advantages of MIMO to multiple users of a WiFi access point, as well as increasing the number of spatial streams (from 4 to 8) and offering improved modulation techniques on the wider channels (256-QAM).
So the improvements to WiFi since 2003 can be roughly broken down into 3 areas:
5 GHz – The higher the frequency of a radio signal, the more it behaves like light, so the more it is affected by solid objects. 5 GHz. signals disperse more in air, and pass through solids even more poorly than 2.4 GHz. signals (which don’t do very well). So, with some notable exceptions (very focused point-to-point links with very clear line-of-sight), 5 GHz is only useful indoors and for very short distances.
MIMO – MIMO is one of the most exciting improvements to WiFi, because it can dramatically improve indoor performance. Of course, both the access point (e.g. wireless router) and the client device (e.g. laptop) have to have MIMO to make the best use of it, but can really improve both range and throughput indoors. Outdoors, however, where there aren’t walls that signals can bounce off of, the value of MIMO is very limited.
Wide channels – I sometimes explain that radio signals are a lot like plumbing. If you have a water hose with a constant pressure, you can put a narrow nozzle on it and push a little water a long ways, or you can put a wide nozzle on it and push a lot of water a little ways. Wide channels are like a wider nozzle: more bandwidth that doesn’t travel as far.
The key to getting maximum range outdoors is to “squeeze” the stream down as much as possible to force it out toward the horizon. The AyrMesh Hubs do this by going somewhat against the “trend” in WiFi:
2.4 GHz only – for lower dispersion and best penetration of solid objects
SISO – focusing the radio signal (the spectral density) into a single beam for maximum range
Narrow channels – focusing the radio signal into the smallest channel width for maximum range
When we introduced the AyrMesh Hub2n, we noted that it uses 802.11n technology. However, while it does comply with the 802.11n standard, it is, essentially, using the 802.11g features present in 802.11n and almost nothing unique to the 802.11n standard.
That’s not to say that we’re not keeping close tabs on the improvements to WiFi and trying to figure out ways to improve our products. By moving to 802.11n, we picked up WPA2/AES-CCMP encryption, which is actually more efficient on many WiFi radios equipped with hardware encryption, and new modulation methods which may provide marginally better performance. Right now we don’t see any improvements from MIMO, for instance, but we may yet find a way to make use of it. We also have hope that new, more efficient modulation methods could provide us new ways to increase the range and throughput of outdoor WiFi.
We also made use of another WiFi standard in the Hub2n: 802.11s, the new WiFi meshing standard. Time will tell, of course, but we hope that adopting this standard will enable us to introduce new Hub models and other equipment without changing the meshing, effectively “future-proofing” the Hubs.
What this means is that now is the perfect time to build your Wireless Farm Network using WiFi: the technology is extremely well-proven, inexpensive, and reliable. There are lots of contenders to take the place of WiFi for outdoor connectivity, from Super-High-Frequency radio to “White Space” radios (using the unused frequencies in the Television band). None of them are going to offer anything close to the price/performance you can get today out of outdoor WiFi, at least for a very long time. So you can build your network well-assured that there isn’t something waiting in the wings to make your investment obsolete. There will never be a better time to build out your Wireless Farm Network.
We were curious about that question ourselves, so we commissioned a survey of growers across the corn belt.
We got over 100 responses to our call from Minnesota to Tennessee and Ohio to Nebraska, all across the Midwest.
All things wireless top the list of technology-related gifts that farmers want for Christmas this year. More than 40 percent of those surveyed are putting wireless remote cameras and wireless remote weather station / soil sensors on their lists. And nearly 50 percent would like a wireless farm network that extends up to 7.5 miles from their homes.
Farmers are also frustrated by the lack of connectivity on their farms. In fact, nearly 80 percent of those surveyed said they are frustrated that their wireless network does not extend to sheds, grain bins or nearby fields.
Other technology-related gifts that farmers say they want according to the survey include wireless remote grain monitoring, an iPad or other tablet, a new router, and remote thermal imaging.
If you’re worried that Santa might not deliver this year, you might want to take care of yourself: go to ayrstone.com and start a new AyrMesh Network for yourself (or expand your existing network) so you have the wireless access you need!
It reminds me that WiFi isn’t entirely straightforward, and some explanations of the vagaries are in order.
As Adam points out, interference is potentially a huge problem on WiFi. One problem is that the 2.4 GHz. WiFi band was partitioned out into 11 channels (in the U.S. and Canada), but most of those channels actually OVERLAP each other. There are only THREE DISTINCT CHANNELS: 1, 6, and 11 – all the other channels overlap at least one of these three (and each other). For a good explanation with graphics, I always recommend Wikipedia.
As he points out, if you have your “indoor” WiFi and your “outdoor” WiFi on the same channel, they’ll interfere with each other, reducing the range and bandwidth of both. Even if they are less than five channels apart this will happen to some degree. The AyrMesh network always comes by default on channel 6, so you can either change your home router’s channel to 1 or 11, or change the AyrMesh channel using your account on AyrMesh.com.
InSSIDer – courtesy of MetaGeek
We use and recommend a couple of tools to help discover WiFi interference. InSSIDer for Home is a free program that run on Windows, Mac, or Android, and shows all of the WiFi Access Points in range of the computer and a pretty good estimate of the signal strength of those Access Points. (NOTE: It has recently been pointed out that getting InSSIDer for Home from the Mac App Store actually costs $4.99)
WiFi Analyzer for Android, Courtesy of farproc
WiFi Analyzer is another free app that runs on Android. It’s a little simpler and quicker than InSSIDer, and has become my “go-to” solution for taking a “quick look around” on my phone.
Chanalyzer Spectrum Analysis, courtesy of Metageek
Just to make it a bit more interesting, however, I have to point out one more fact: WiFi is far from being the only thing using the 2.4 GHz radio band. Cordless phones, baby monitors, wireless surveillance cameras, certain radars, and microwave ovens all use the same spectrum, so they can all potentially interfere with your WiFi. This is, in fact, precisely why Metageek gives away InSSIDer – they sell tools called “Spectrum Analyzers” – their “Wi-Spy” Spectrum Analyzers are excellent and relatively inexpensive. They can show not just WiFi interference, but all the interference in the 2.4 GHz. band. They even offer a very nice “Wi-Spy mini” bundled with their “InSSIDer for Office” product for only $199.
You probably won’t need a spectrum analyzer for your AyrMesh network. Out in the country there’s very little interference, and it takes a while to learn how to use a spectrum analyzer effectively, even with Metageek’s excellent software.
However, getting a copy of InSSIDer and/or WiFi Analyzer is something I recommend to everyone who’s curious about their local WiFi environment.