A different approach to WiFi cameras: Dropcam

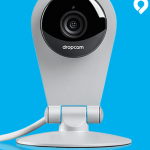
I have been using a Dropcam for about a year now and have been very impressed with it. It is a very low-cost WiFi IP camera that, instead of offering local viewing through a webserver on the device, automatically streams its video to Dropcam’s servers, where you can view the video from anywhere on the Internet.

Just to review, the way a “normal” IP camera works is that it has a webserver on the device, and you access that webserver in order to view the video from the camera. For instance, if you connect the camera to your router, you’ll check the router to find its IP address – let’s say, for instance, that it’s 192.168.1.47.

You then use a web browser to view http://192.168.1.47, and your camera shows up there. However, if you want to view  your camera from outside your network, you have to “port forward” a port to the web port on the camera. A number of factors can make that operation difficult.

The Dropcam does away with all of that, because the camera is only attached to your computer with a USB cable ONCE for configuration (it gets the WiFi configuration from your computer – mine uses the WiFi signal from my Remote Hub out in my workshop), then it joins your network and streams its video to dropcam.com. The camera and dropcam.com website have proven to be very reliable.

It is powered with a mini USB cable (5 volts), which is included, along with a wall plug USB power adapter.

Dropcam allows you to view the video from your camera for free on your dropcam.com account. If you want to record the video so you can go back and look at past video (e.g. for security purposes), they have inexpensive recording subscriptions.

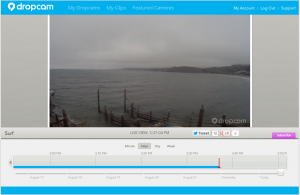
They have a number of demo cameras set up – including a nice one looking out a window onto Monterey Bay in California. While I couldn’t find a demo camera on a farm, this gives you a nice idea of how good the picture is and what the interface looks like – very good, very easy to use.

The Dropcam is very good, but it’s far from perfect. The big advantages are:

  • Easy to set up and use
  • Small, lightweight, inexpensive
  • Transmits video AND audio – look and listen
  • IOS and Android apps for viewing cameras
  • Visible over the Internet, no port forwarding

However, it has a few very salient disadvantages:

  • Not suitable for outdoor use – indoor use only
  • No local access – you HAVE to be connected to the Internet to view the camera
  • Fixed lens – no telephoto, no wide angle, no point/tilt/zoom
  • A couple of seconds delay between the camera and the video stream

If you have a place you want to keep an eye on, Dropcam is an excellent choice. The quality of the camera and picture is comparable to my “favorite” indoor camera, the Axis M1033-W. As you can see, although the camera has to be indoors, it does a nice job showing outdoor scenes if it can be placed inside a window.

Dropcam is, potentially, a very useful tool for your home and farm.


New Ayrstone Product: the AyrMesh Receiver

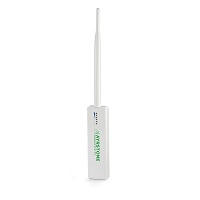
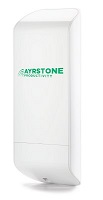
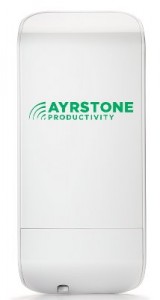
Today we’re announcing a new product in the Ayrstone AyrMesh line: the AyrMesh Receiver.

The AyrMesh Receiver is actually, of course, more than a receiver – it transmits and receives data – but it is designed as a simple, low-cost way to put one or more “wired” (Ethernet) devices onto an AyrMesh network. It is very similar to our AyrMesh Hub, but with a couple of important differences:

  1. The AyrMesh Receiver connects to the Hub’s WiFi signal, not the wireless mesh signal.
  2. The AyrMesh Receiver does not create its own WiFi access point – it is a client device only
  3. The AyrMesh Receiver uses a directional antenna for maximum range – it can be positioned up to 2 miles away from an AyrMesh Hub (optimal conditions).

Typical uses for the AyrMesh Receiver include:

  1. Using high-end IP cameras or other network devices that do not have WiFi
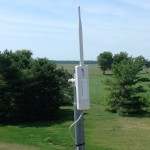
  2. Bringing the AyrMesh network inside of metal buildings – an AyrMesh Receiver can be placed on the outside of the building and devices inside can be connected to the LAN port of the receiver. You can even put a WiFi access point inside the building so you have WiFi indoors as well as outdoors.
  3. Connecting devices like network-enabled weather stations in more distant fields – since the AyrMesh Receiver can be up to 2 miles from your furthest Hub, you can now include areas in your network that were previously unreachable.

The AyrMesh Receiver is available now from Ayrstone – please see our website for details.

Wireless Farm Networking: what and why

A few years ago, we identified a real need in the agricultural market for more robust, internet-connected farm networks. This was driven by our work in precision agriculture; what we saw was that there was a glut of usable data that could be helping growers make better (and more profitable) decisions, but that data was mostly trapped on personal computers and in-cab monitors.

As we looked at this situation, we realized there were two equally important needs which were interrelated: the first is a comprehensive platform for turning all this raw data into actionable information, and the second was a facility for collecting the data and putting it to use. But there’s a “chicken and egg” problem here: if you don’t have the data, you can’t turn it into information, but there’s no good way to collect and use the data currently.

The AyrMesh Hub

So we decided to tackle the second problem: create an “Enterprise Network” for farmers and ranchers, so they could collect data from their farm operations effortlessly and use that data to make more informed decisions. We realized, of course, that a typical network was not going to work for the farm: everything is very far apart, so laying cable (or even fiber) is generally not a workable solution. Besides, the network should ideally encompass the tractors, sprayers, and harvesters out working in the fields, so wireless is the only option. This was the impetus that gave birth to the original AyrMesh Hub.

The idea was fairly simple: take some of the ideas used in the “Roofnet” project at M.I.T. and adapt them to building a low-cost wireless mesh network for farm use. The key requirements were:

  1. Use WiFi – other, proprietary mesh networks had been tried, but they require a wireless “client” device for anything you want to put on the network. Lots of things have WiFi today – it’s an easy, familiar, open technology
  2. Design the system for a farm – provide good bandwidth to relatively few “clients” spread over a very wide area. Most WiFi devices in the market today are designed for exactly the opposite: a metropolitan mesh network, where you have many people in a very small area and high bandwidth demands.

What we have seen is that, like all technologies, there is an adoption curve. The first step is the desire to use one’s Internet connection beyond the confines of the house. Especially with the advent of smartphones and tablet computers like the iPad, the ability to have instant information and communications everywhere you go on the farm can be a reality, even if cellular data is not available everywhere on your farm.

A WiFi Camera

The second step is connecting sensors to the network to “keep an eye out” on your farm. The most popular and demanded sensor, of course, is the IP camera. The ability to bring up a view of an area of your farm, whether to see the settings on the grain dryer, keep an eye on livestock (especially in the middle of the night), or as the basis for a security system, cameras seem to have a place on every farm. But, moving forward, putting network-connected environmental sensors in livestock buildings and distant fields can bring terrific pro

A Weather Station at the edge of a field

ductivity gains. Knowing the temperature and humidity in your livestock barns can help optimize your HVAC usage, while knowing the wind and rainfall in a distant field can save a trip if it’s too windy or too wet to work.

Lots of data here…

In addition, some of the precision agriculture vendors are starting to put WiFi into their in-cab monitors, so you can access the data on those monitors over the network instead of having to move cards or USB sticks around. Being able to access your “as applied” and harvest data allows you (or your agronomist) to much more easily determine your variable rate applications as you go through the season, potentially cutting your costs and maximizing your yield.

Network-controlled relay, courtesy controlbyweb.com

The third step is farm control: being able to actually get things done on the farm over the network. Grain dryers, pumps, irrigation systems, HVAC systems, and other equipment could be controlled over the network. This means that you can potentially control your grain dryer from the bedroom, or even while you’re running errands in town, since your network is connected to the Internet.

What we learned in the 1990s and 2000s when networks were becoming ubiquitous in the corporate world is that the presence of the network creates opportunities to improve the business in unexpected ways. We don’t pretend to know what all the uses are for a wireless farm network, but we’re very excited to see what they are. We’re here at the very beginning of farm networking, and the future is limitless.

Welcome to the Ayrstone Blog!

This is me, but I’ll probably never look this good again.

This is what it’s about: Ayrstone on the farm. This is Matt Hughes’s farm in IL

This is a blog about Ayrstone, our products, networking, particularly wireless networking, the internet, farm/ranch management, and whatever else we find interesting. The primary author is Bill Moffitt, President and Chief technical guy for Ayrstone Productivity.

As Ayrstone customers who have spoken to me can attest, my interests are many and varied, but they always circle back to ways to get things done better, cheaper, safer, and more effectively. I am a strong proponent of technology, but I’m not really what you might call an “enthusiast.” I think of myself more as a crash-test dummy: I want to try new things, see what the potential is, and then talk about what I find (good or bad). The nice thing about this is, I hope, I can find things that are genuinely helpful. The bad part, of course, is that you may not always agree with my assessment. But, of course, that’s what makes this interesting: I expect some lively comments and discussions about the relative merits of different approaches here.

Just so you know what to expect, I’m a “machine gun” writer: I’ll go a long time without writing anything, and then I’ll put up several posts in rapid succession.

I welcome your comments, both positive and negative. This world of networking on the farm has a lot of big, new opportunities, and I hope I can help you make the most of it.

If so, I’ll have done my job.