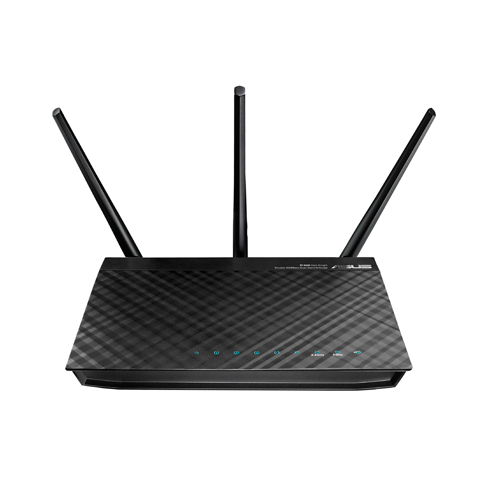
The ASUS RT-N66U – a modern, high-end home wireless router
In the last article in this series, I discussed what a home router is and a little bit about how it works, as well as providing guidance on how to set up the DHCP server.
IP addresses on your LAN are assigned one of two ways: either by the router’s DHCP server, which provides them out of the DHCP address pool (which I suggested should be 192.168.1.50 to 192.168.1.254) or by statically assigning them yourself (which I suggested should be out of the remaining 192.168.1.2 to 192.168.1.49 addresses). Assigning static addresses is very seldom necessary on modern routers, however, because most modern routers have a feature called “DHCP Reservations.” This allows you to specify the MAC address of a device and make sure it is assigned the exact same address via DHCP every time it is connected to the router. Using DHCP reservations, you can ensure that your laptop always gets the same IP address without having to configure a static address for it (which is a pain, since you’d have to re-configure it every time you go to the coffee shop).
Using either static addressing or DHCP reservations, you may want to make sure that “infrastructure” on your home network, like file servers, entertainment systems, or security devices always have the same IP address.
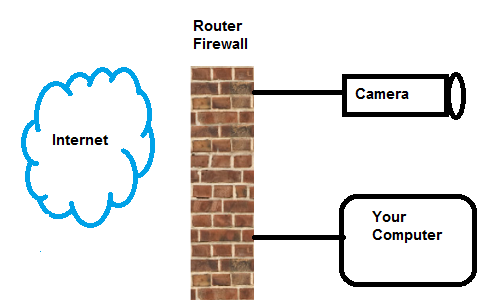
Your router’s NAT usually automatically closes off all the ports on your public IP address, making it impossible to access anything on your LAN from the Internet. In most cases, that’s a good thing – you don’t want the Internet able to reach your private network. But, in some cases, you want to make devices on your network available from the Internet (ALWAYS protected with strong passwords, of course!). The classic example is the IP camera set to watch something important on the farm – it could be the front drive, livestock, or your machine shed – you want to be able to access it from wherever you are so you can check up on it. But you might also want to be able to check and operate machinery like your grain dryer, pumps, irrigation systems, HVAC systems, etc. from a distance.
The IP camera has a webserver that uses port 80 (usually) for its interface, so the trick of port forwarding is to open one port on your public IP address and tell your router to “forward” all packets coming to that port automatically to port 80 (or whatever port you configure) on the camera. So you “knock a brick” out of the router’s firewall by specifying one port on the public side (I like to use ports 7001-7099, because very few services use these ports) and forward that public port to a port on your camera.
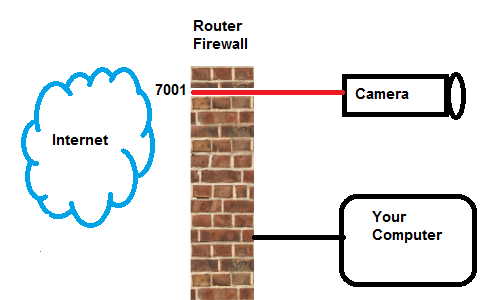
The way you do this varies from router to router, but the drill usually entails going to the “port forwarding” interface on your router and specifying the incoming or public port (7001), the device that’s receiving the packets (your camera’s IP address – 192.169.1.something), and the port on the device that will receive the packets (port 80). Then, if your public IP address is 101.102.103.104, you can access your camera on the Internet at http://101.102.103.104:7001 (the IP address, a colon, and the port number). Some routers allow you to specify only certain incoming IP addresses that can access the camera, but that’s usually not a good idea because, for instance, if you want to look at the camera from your smartphone, you won’t know the IP address of the smartphone.
NOTE: some routers (stupidly, in my opinion) require that the port numbers on the public side and the private side be the same – they won’t forward port 7001 on the public side to port 80 on your camera. If you have a router like that, you’ll need to reconfigure your camera (or whatever device you have) to the appropriate port (e.g. 7001) port before you can do the port forward. You shouldn’t forward ports under 1024 unless you know exactly what you’re doing, because you might be disabling something your router needs to function properly. Forwarding extremely popular ports like 80, 20, 21, 22, 23, 25, etc. can also attract password crackers and other undesirable elements to your network.
Let me emphasize at this point the importance of a strong password on anything that’s exposed to the Internet – if you can access it, so can anyone else, so make sure it’s locked down.
On my own home network, I have several ports forwarded to different IP cameras around my property, as well as ports forwarded to my desktop Windows machine (using VNC so I can access it easily when I’m away) and my Linux development machine (using SSH). I can actually access any of those devices using my smartphone, so I can stay on top of things anywhere I have an Internet connection.
Pingback: IP Cameras on the Farm: Part 1 | Ayrstone Blog
Thanks great overview