 As you know, I think that the “Internet of Things” (IoT) has enormous potential for the farm. But we have all been recently reminded of the problems we are facing as BILLIONS of new devices come on to the Internet – Friday October 21, the IoT literally broke the Internet.
This event has been called the “Mirai botnet attack.” This is an extremely important event, because it used IoT devices to effectively bring the Internet to a stop for several hours on Friday, October 21. Even Ayrstone was affected: we use Zendesk for our customer support portal, and it was unavailable off and on on Friday.
This attack was innovative in two ways: first, it did not attack the affected sites directly, but rather attacked the Domain Name Servers (DNS, the servers that turn domain names like ayrstone.com into IP addresses like 104.24.21.15) of Dyn.com, making a huge number of websites, including Zendesk, Twitter, and others unreachable, even though they were working just fine.
But the most important innovation was the way the attack was done – using a Distributed Denial of Service (DDoS) attack from IoT devices. DDoS attacks work by sending a huge amount of data to a server from a large number of devices on the Internet, overwhelming the server and causing it to fail. Up until now, the “botnets,” as the devices sending the data are known, have mostly been personal computers infected with viruses that allow a remote user to control them and cause them to send out streams of data to the target server.
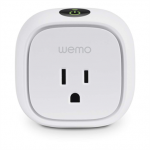
As I mentioned, however, this attack was different, because it used IoT devices – IP cameras, routers, wireless networking devices, and other little devices that people don’t see as being “computers.” But your router or IP camera has a lot more computing power than the powerful desktop computer you had just a few years ago.
Hackers were able to access these devices and install “botnet” software on them because – and this is THE IMPORTANT THING – the passwords were NEVER CHANGED from the defaults. For instance, many devices come with a default username of “admin” and a default password of “admin” or “password.” If those are not changed and they are exposed to the Internet, they are an open invitation to hackers.
Now, most of the devices on your network are NOT currently exposed to the Internet – they are safely hidden from the Internet by your router’s NAT firewall. But it is still important to change the default password on devices, and, if you have “port-forwarded” to any devices to make it accessible via the Internet, it is DOUBLY important to make sure it has a STRONG password to protect it.
Ayrstone products, of course, are protected because the username and password for each device is set from AyrMesh.com. The only way an AyrMesh device can have the default username and password is if you don’t have an AyrMesh.com account, and we regularly disable devices that are not checking into an active account. However, even at that, AyrMesh devices should always be used behind a router’s firewall and not exposed to the Internet.
These devices are incredibly useful when used properly, but you have to take some minimal precautions to keep them safe. More information about the Mirai botnet attack and security of IoT devices can be found in this article and elsewhere.
This attack is a good reminder of three things:
- Make sure you always use good passwords (long, not a quotation or word) on ALL devices and keep those passwords secret,
- Don’t expose devices to the Internet unless you have to, and
- Purchase networking/IoT products from reliable vendors who can update the firmware to close vulnerabilities, preferably automatically and over the network. If not, make they make new firmware available to close holes as they are discovered, and install it regularly.
AyrMesh devices have firmware that is updated over the network. We issue several updates per year, and you needn’t do a thing – they happen automatically.
If you have any questions, of course, just let us know – [email protected].

 Since we started marketing the AyrMesh system five years ago, we have gotten inquiries from folks who have large houses, offices, and small hotels/motels – can AyrMesh work indoors? The answer, of course, is that it can work, but it’s not optimal for a number of reasons, and we do not recommend it. AyrMesh is designed for outdoor use, mainly in rural areas.
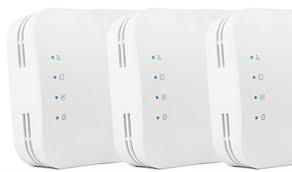 Open-Mesh uses their

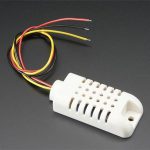
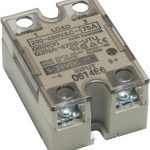
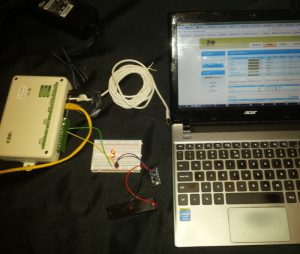 I set mine up on a table to see how it worked. The good folks at eze System included a Microlan temperature probe, so I set up my unit with that connected to the Microlan connector and a couple of LEDs (with a battery) connected to one of the relay outputs.
 I then went to their web-based dashboard and started setting things up. It’s pretty simple – you get a login on the dashboard, and you add your ezeio controller. You can then set up the inputs (in my case, the temperature probe) and outputs (the relay) and then set up rules to watch the inputs and take appropriate actions. If you want to see the details, I have put together a

 First, if you’re growing a few acres of cut flowers, organic vegetables, or other high-value, high-intensity crops, the
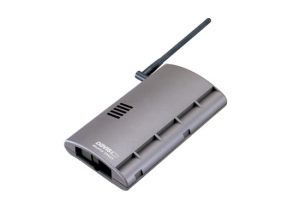
 We wanted to quickly share an article published recently that impressed us quite a bit.
 I read a LOT about the “Internet of Things” (abbreviated IoT) is in the news lately; you probably have see it too, and there is a lot of excitement around it. And I would argue there’s good reason for that – it is going to change everything, perhaps more fundamentally than cellphones and, later, smartphones. But it is important to understand what the IoT is, what it is not, and how it will affect life on the farm.
 motion, and lots of other things) and robust built-in data communications infrastructure (WiFi)? What could you monitor? What could you control remotely (or even automatically), especially using the data you are getting from monitoring?
 There are all kinds of new technologies and products available for farming – these new “AgTech” products hold real promise to change the practice and the economics of farming. But you have to evaluate them realistically to understand how they will help you improve your profit: increase revenue or save costs.
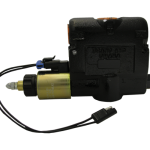
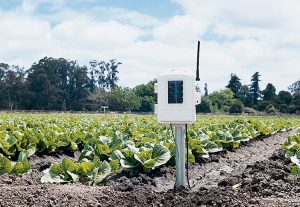
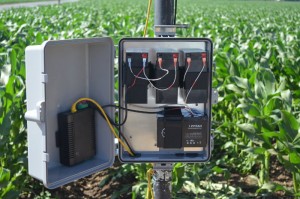
 We have been asked multiple times how to extend the AyrMesh network beyond the availability of plug-in power. The key, of course, is solar panels and/or wind turbines, along with batteries
 to hold the power when the sun isn’t shining or the wind isn’t blowing.
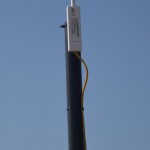
 The system provides Power over Ethernet (PoE) for the radios, just like the power supplies that come with the AyrMesh products. The mechanical considerations (attaching the solar panel and battery pack to the pole or tower) is extremely simple, using either U-bolts or hose clamps. Using this to extend your network out into your fields will enable you to use the AyrMesh Cab Hub to automatically move data off your in-cab computers and have WiFi coverage in your cab wherever you are on the farm.